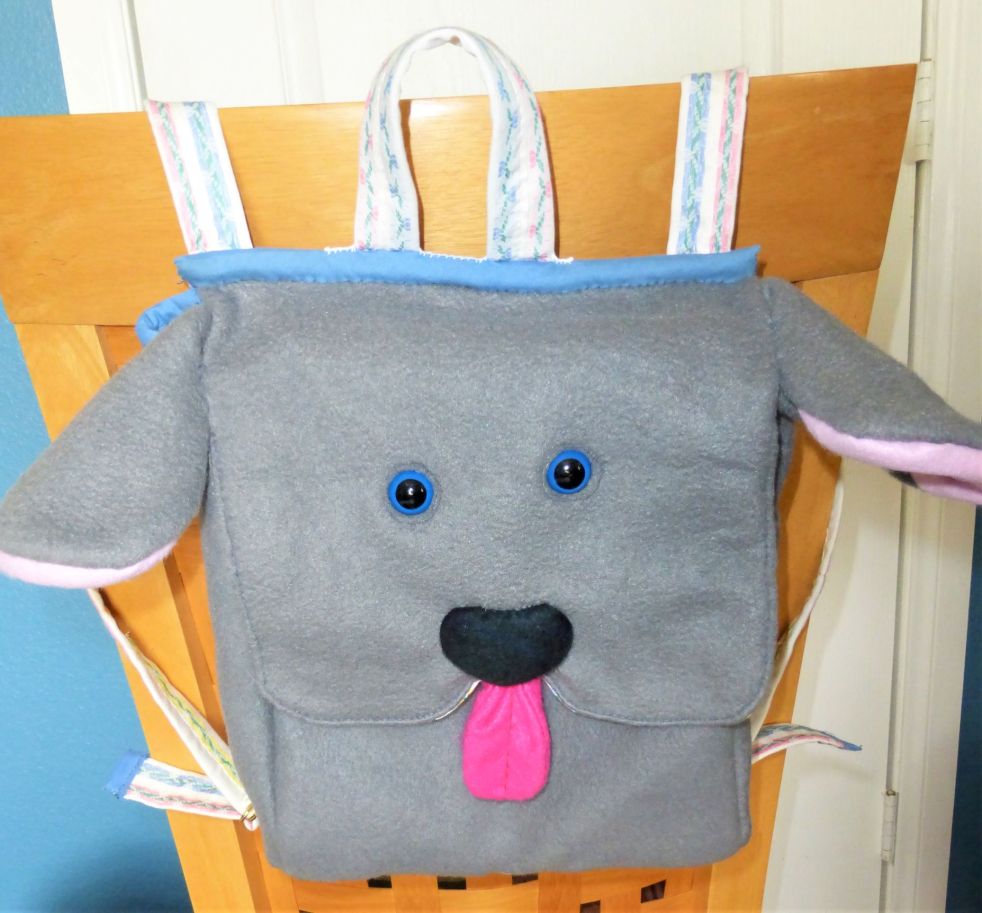
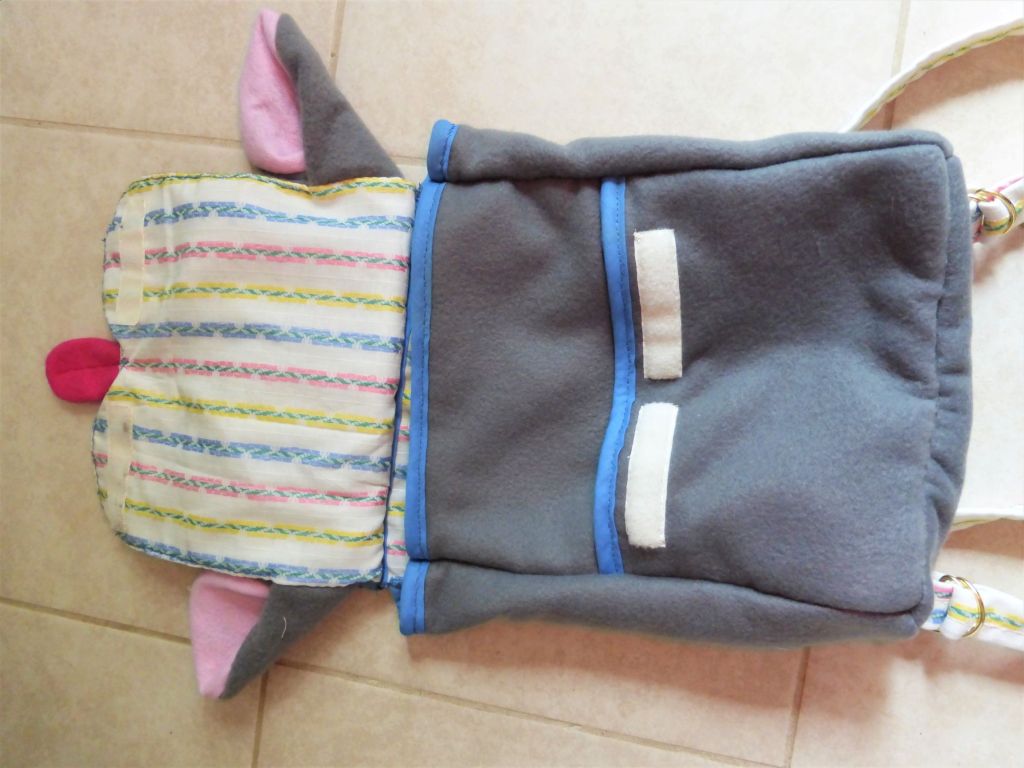
Thought I’d share my latest creation, this adorable hand sewn puppy backpack.
I made this as a birthday gift for a sweet little girl turning 5 🙂 This is the first backpack I’ve ever made and I took quite a while deciding just how I wanted to make it.
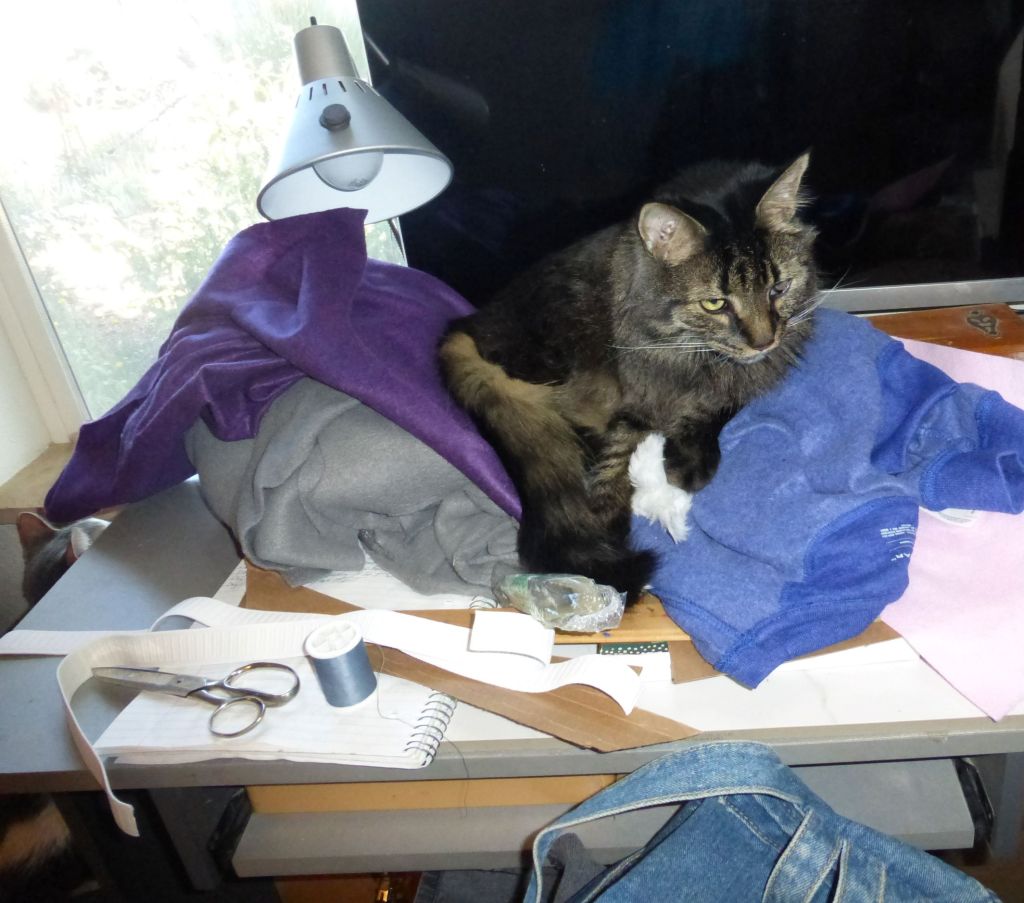
Naturally Calcifer helped with this project 😉 Here you can see that he approves of the fabrics I’ve chosen.
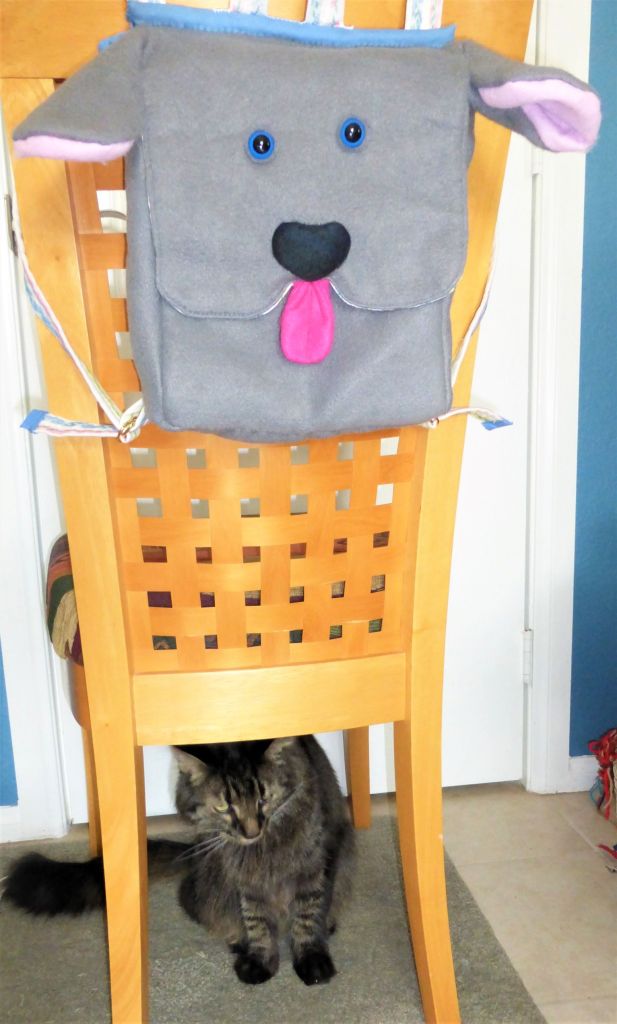
He seems to approve of the final product as well, even though it is a dog (although I may end up making a cat version too).
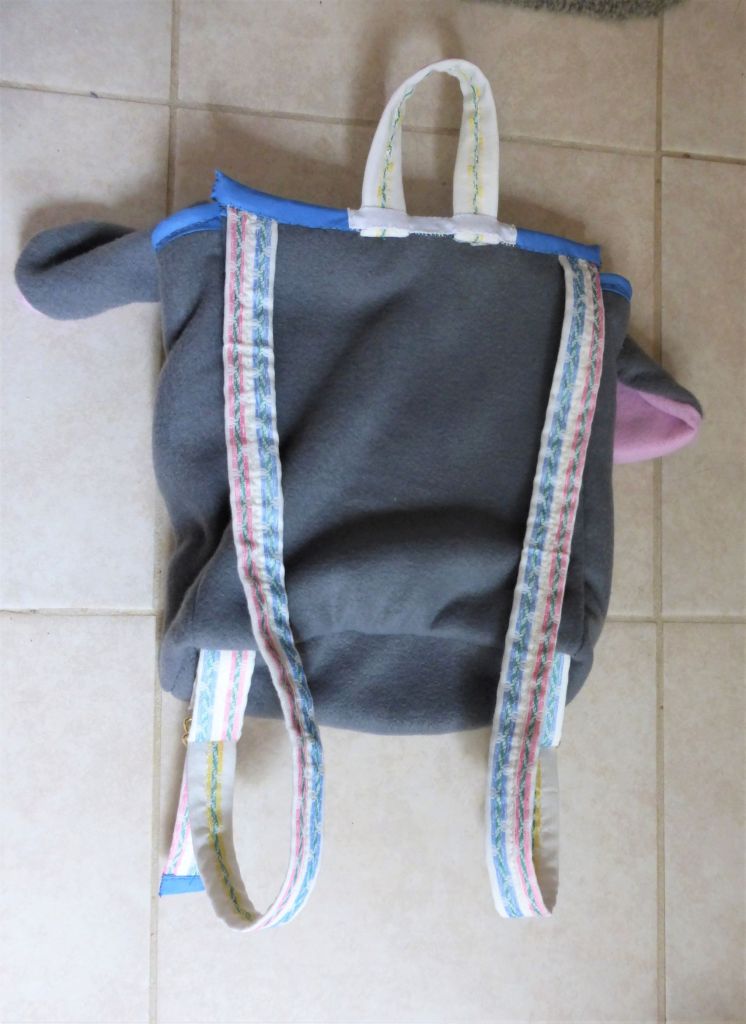
I even made the (adjustable) straps to match the lining! I created the pattern for this backpack myself. I knew how I wanted it to look and just couldn’t find the perfect pattern online. I did get lots of ideas and inspiration searching pictures of toddler backpacks though.
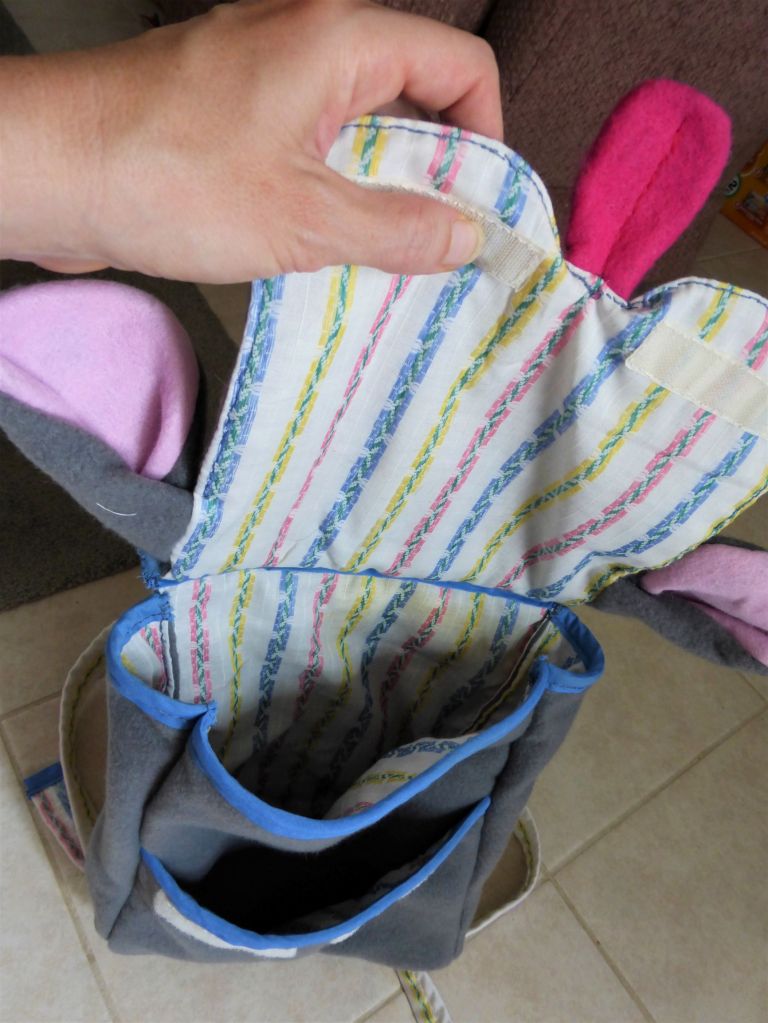
I chose to use velcro closures and add a pocket to the front. The lining fabric is sturdy cotton and the outer layer is soft, thick fleece and the seams are double sewn (by hand). I wanted to make this backpack durable as well as cute 😉
I’m really happy with the way this turned out, and I’ll probably end up making more of these, possibly with different animals. I’ve got more than a few ideas floating around in my head 😉
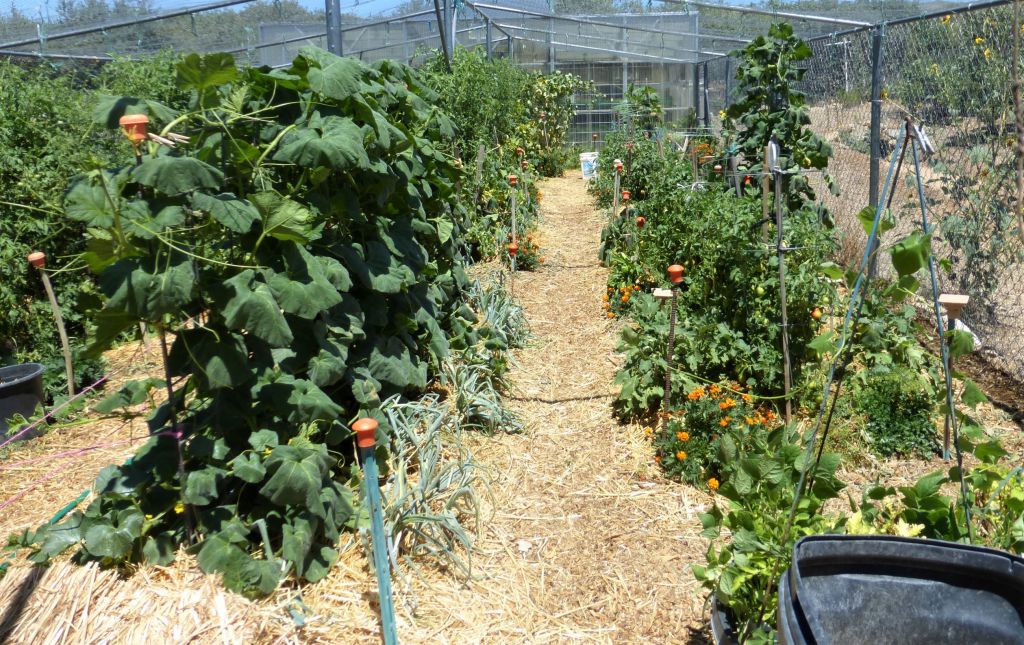
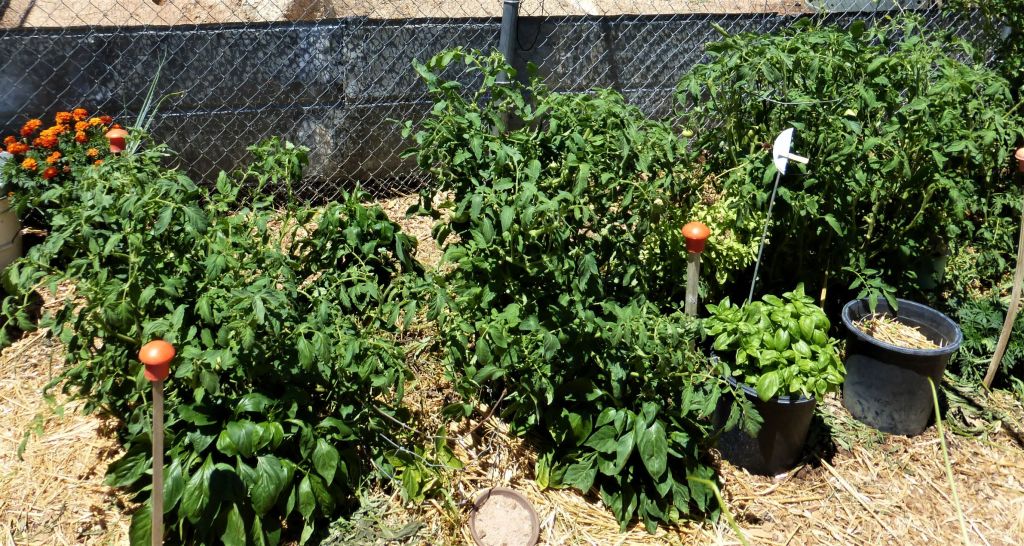
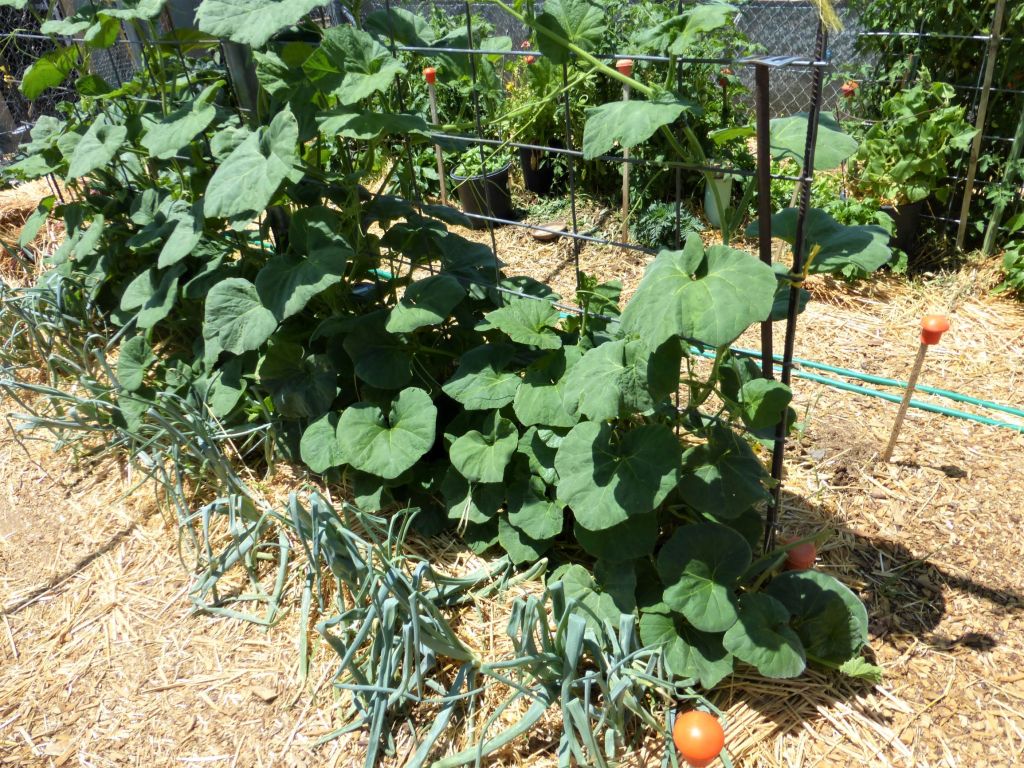
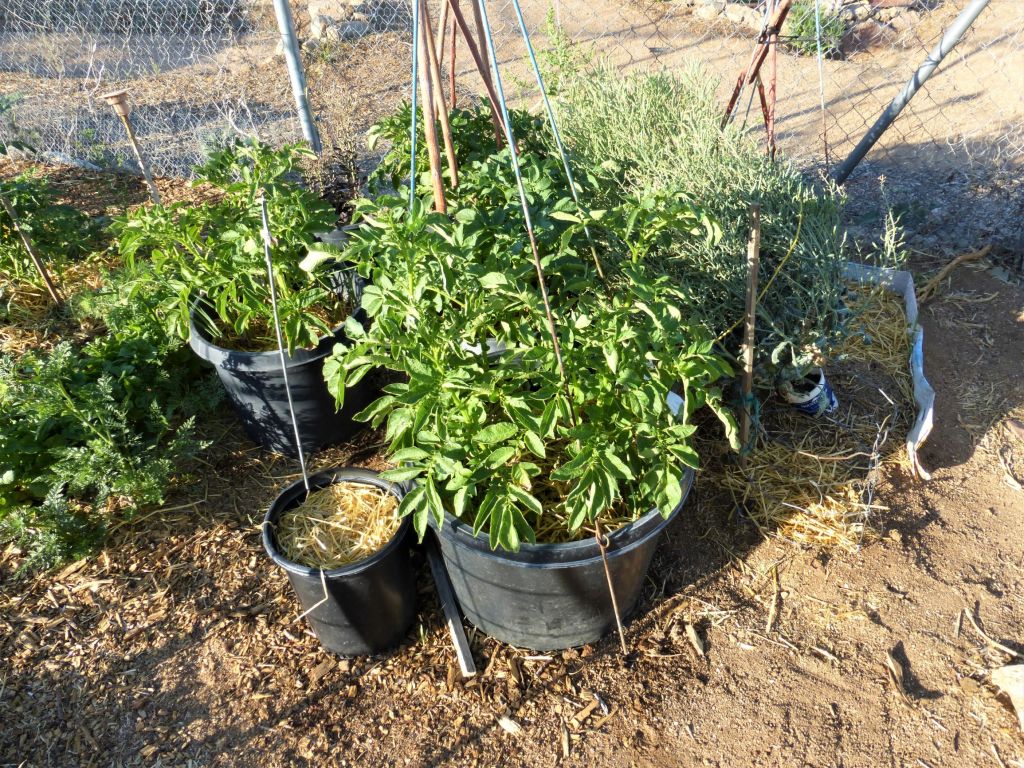
To say it’s been a busy month would be putting it lightly. The garden is doing better than ever before and I’ve been harvesting, cooking, and preserving as fast as I can 😉 I’ve harvested more in one month than I did for the entire season last year! July is normally the start of monsoon season, but although we’ve had the heat (up to 110 degrees!!) there hasn’t been much rain at all.
In spite of the heat and lack of rain the plants have done really well. I attribute this to the thick layer of straw mulch. I generally water twice a week for the in ground plants and daily for the potted plants.
Homestead tomatoes, bell peppers, and potted basil
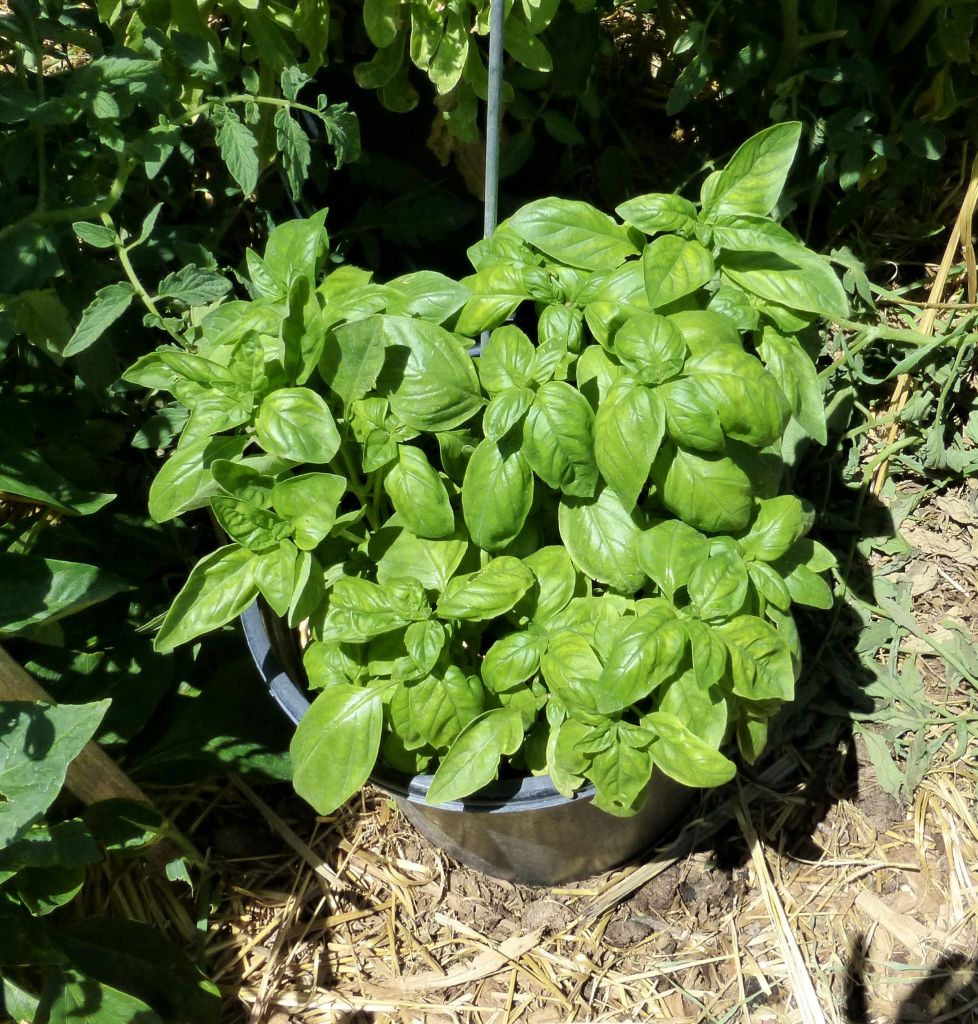
I started harvesting cherry tomatoes at the beginning of the month, earlier than ever before. By the end of the month I was harvesting cherry, pink, yellow, Roma, Amish paste, and my first Homestead tomatoes (and getting BIG harvests just about daily!) The potted basil (planted early in July) sprouted and grew quickly. I’ve been harvesting that to use fresh and even managed to make a few jars of pesto already.
Look at that beautiful basil!
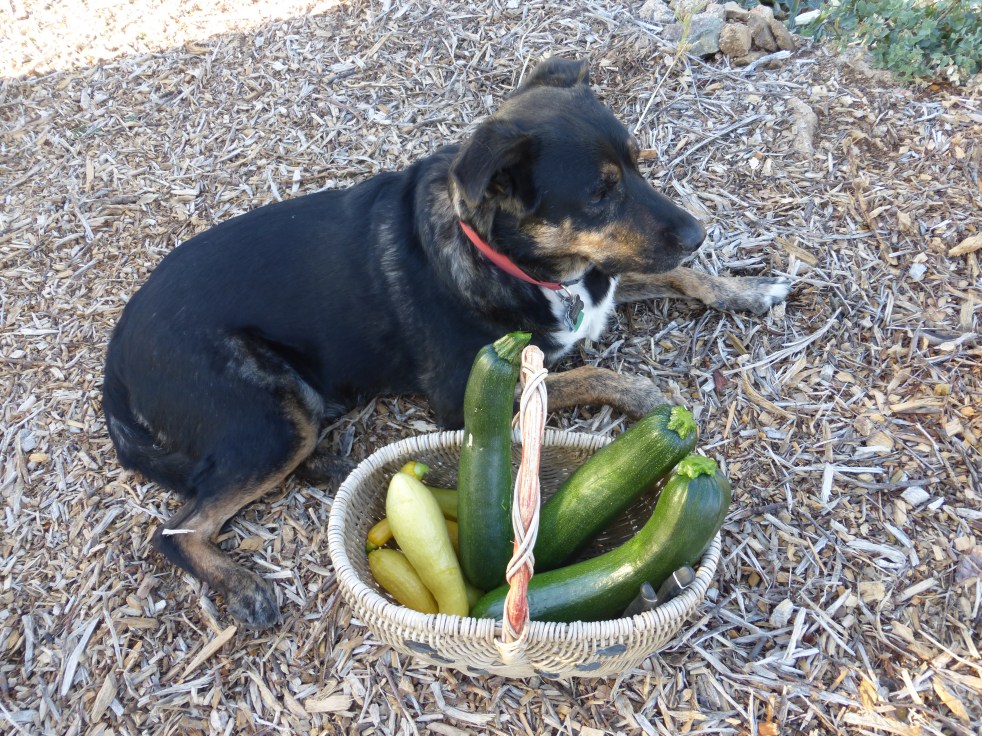
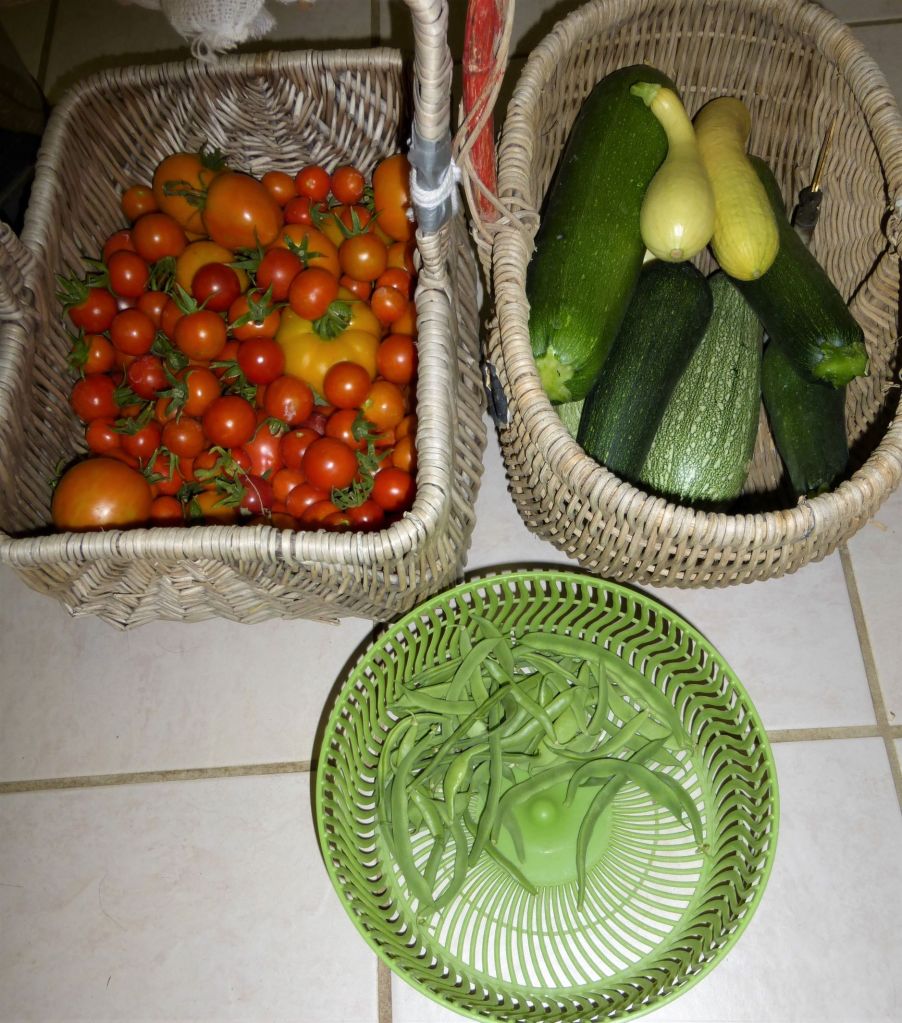
I’ve been harvesting zucchini (Black Beauty and Grey Zucchini) just about daily. I’ve made several pans of stuffed zucchini, Zucchini chocolate cake, roast zucchini, and more. I’ve had enough to blanch and freeze, as well as shred and freeze, so I’ll have zucchini ready for recipes in the middle of winter. Same goes for the yellow squash.
So thankful for the bounty of the garden!
The green beans got off to a good start and I managed to get some good harvests during the early part of the month. I blanched and froze about 3 quarts and have made several meals with fresh beans. I like to saute some garlic in olive oil, add in the beans and cook just until tender- simple and delicious!
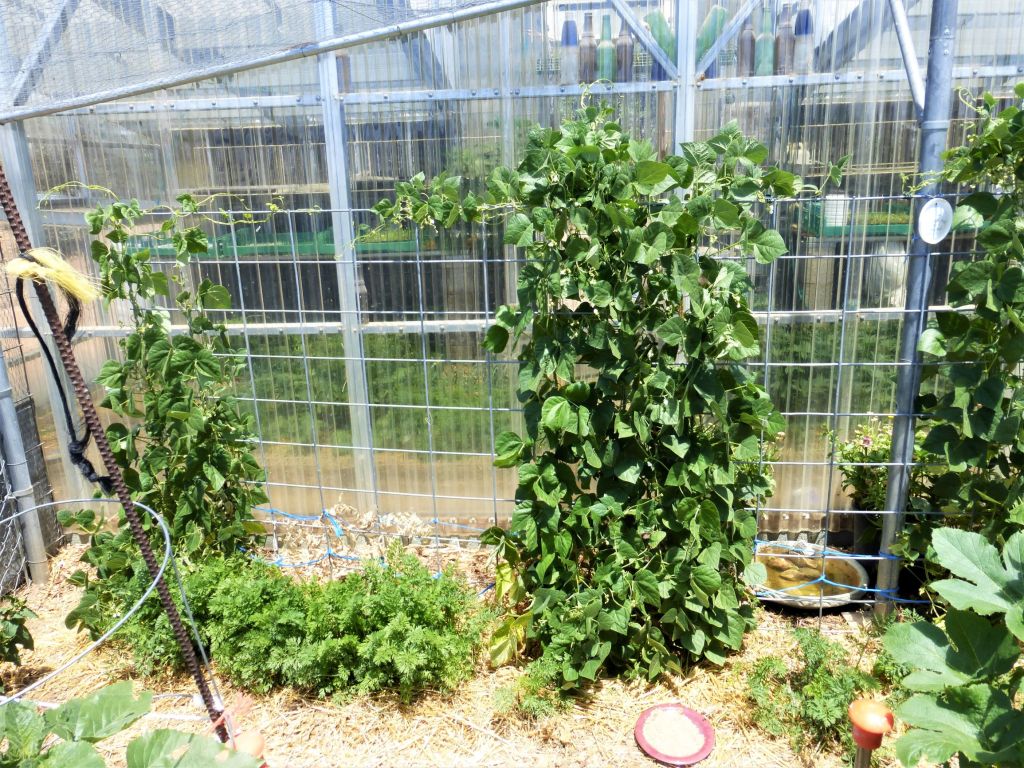
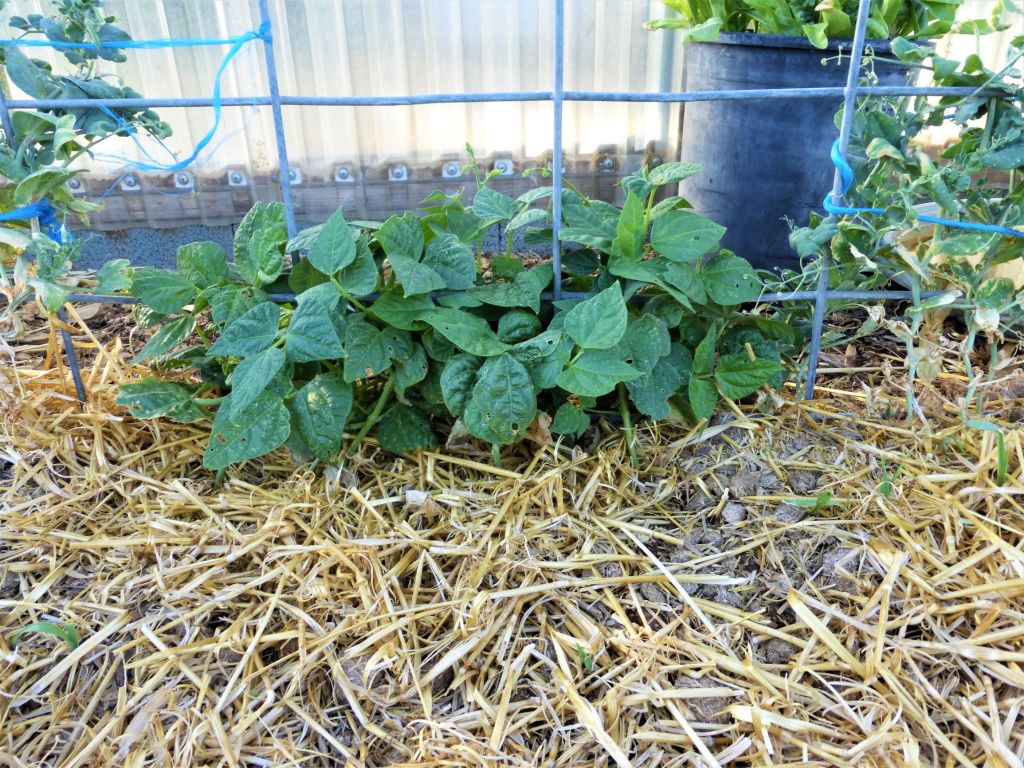
Beans and carrots (with a dish of NOLO bait for the grasshoppers)
The beans got off to a good start, but they’re starting to dry up now. Between the intense heat and the grasshoppers it’s not surprising that the first planting is starting to struggle. I do have beans planted in a few other spots that I started later, so hopefully they’ll start producing soon. I try to make successive plantings with all the veggies that will grow quickly, like beans, summer squash, basil, and greens.
Second planting of zucchini and cucumbers on the end
My second planting of zucchini took off quick and is starting to produce. In the picture above the cucumber plants (on the right) look really good. I managed to get about 4 cukes off the plants before they just up and died:( I’ve had a really hard time with cucumbers (but I keep trying!).
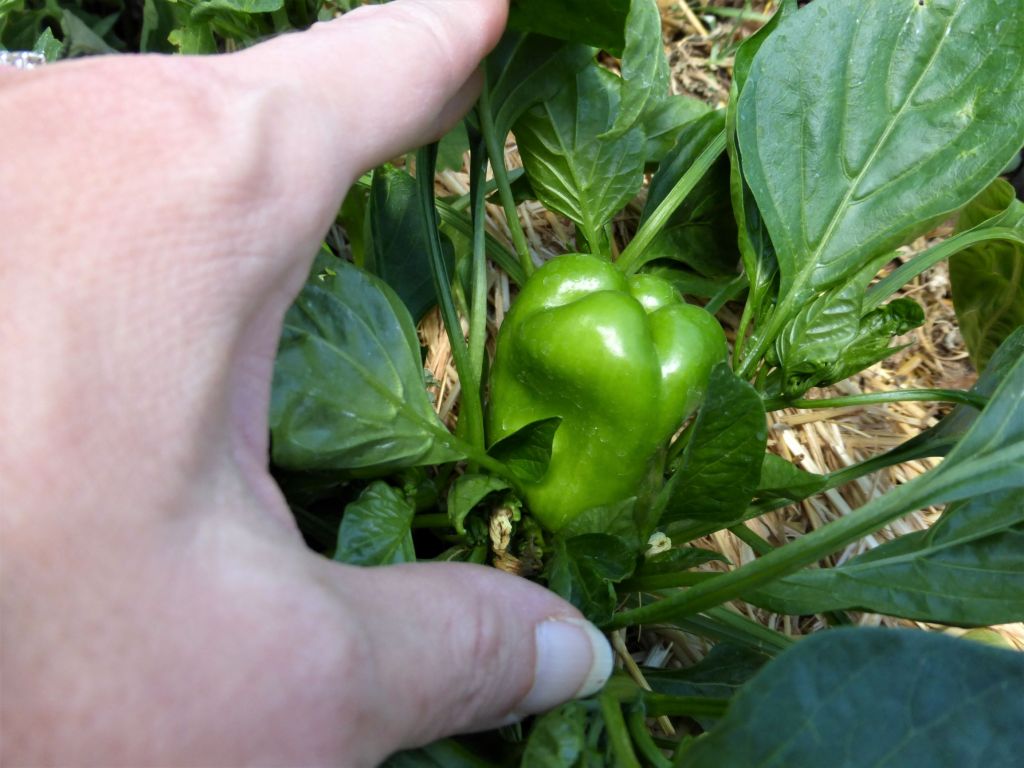
Bell peppers are coming along nicely
After a rough start this spring the peppers have started to really take off and I’ve got quite a few green peppers on the plants. I’ve never harvested red, orange, or yellow peppers before mid to late August, so I’m just trying to be patient and waiting for them to get ripe.
Cantaloupe are full of flowers!
The cantaloupe took a while to come up, and I’d almost given up on them, but they’ve really taken off lately. They’re loaded with flowers and I’m really hoping for a good harvest. Fresh cantaloupe is absolutely delicious!
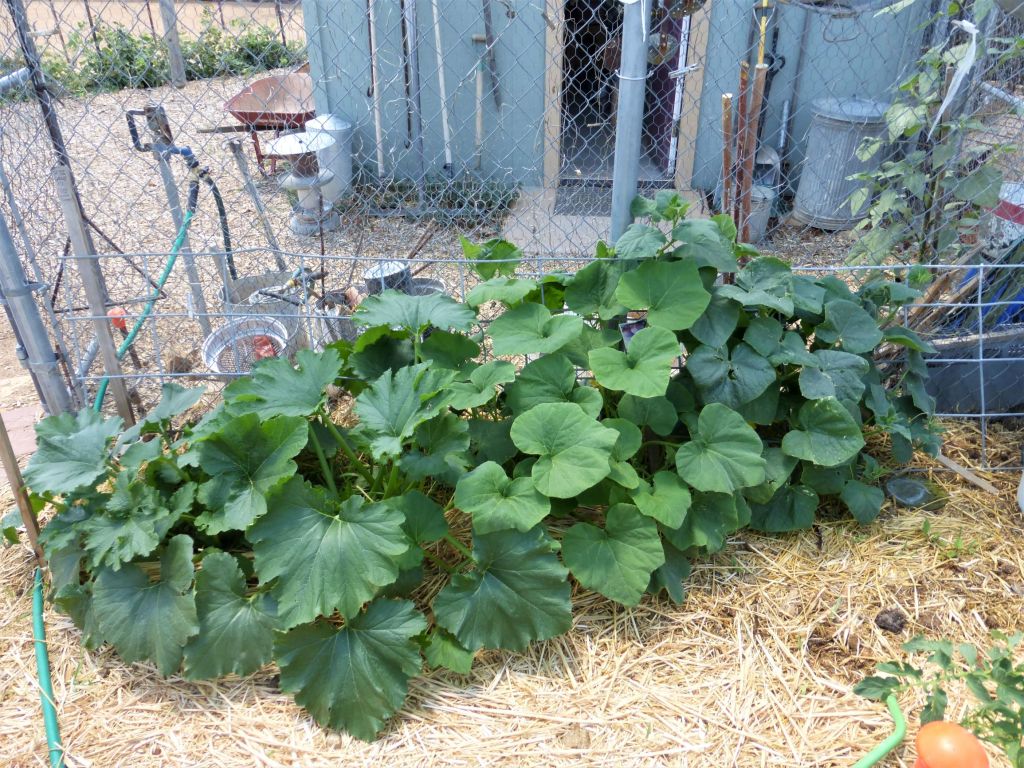
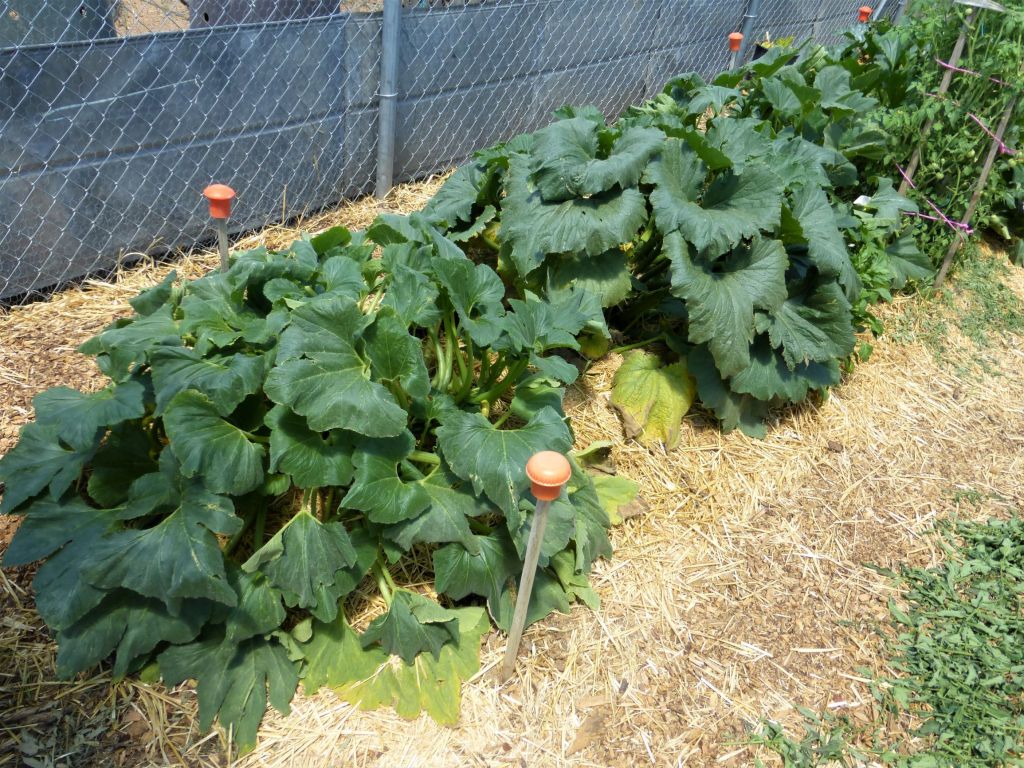
Zucchini and yellow squash plants have gotten huge!
The first planting of zucchini and yellow squash have been producing like mad and I’ve only lost one plant so far. Amazingly I’ve had minimal squash bugs- a first for this garden. In years past those bugs have absolutely decimated my squash plants.
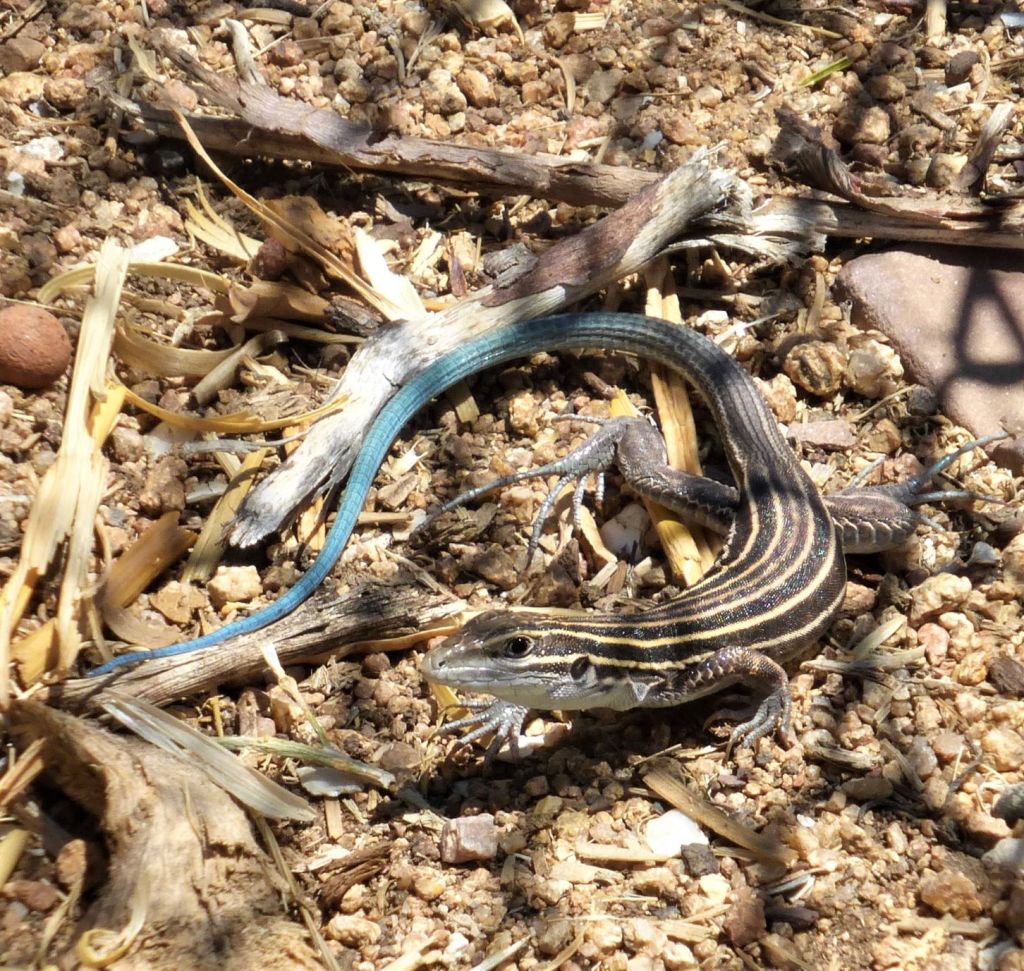
Desert Grassland Whiptail
This year I’ve got LOTS of lizards and beneficial insects in the garden though, and I really think they’re working overtime to keep the bad bugs at bay. I’ve only used Neem a few times when I spotted squash bug nymphs emerging, and then only as a spot treatment. Neem is organic and way safer than chemical pesticides, but it will still kill the good bugs along with the target insects, so I’m trying to play it safe and keep a healthy balance.
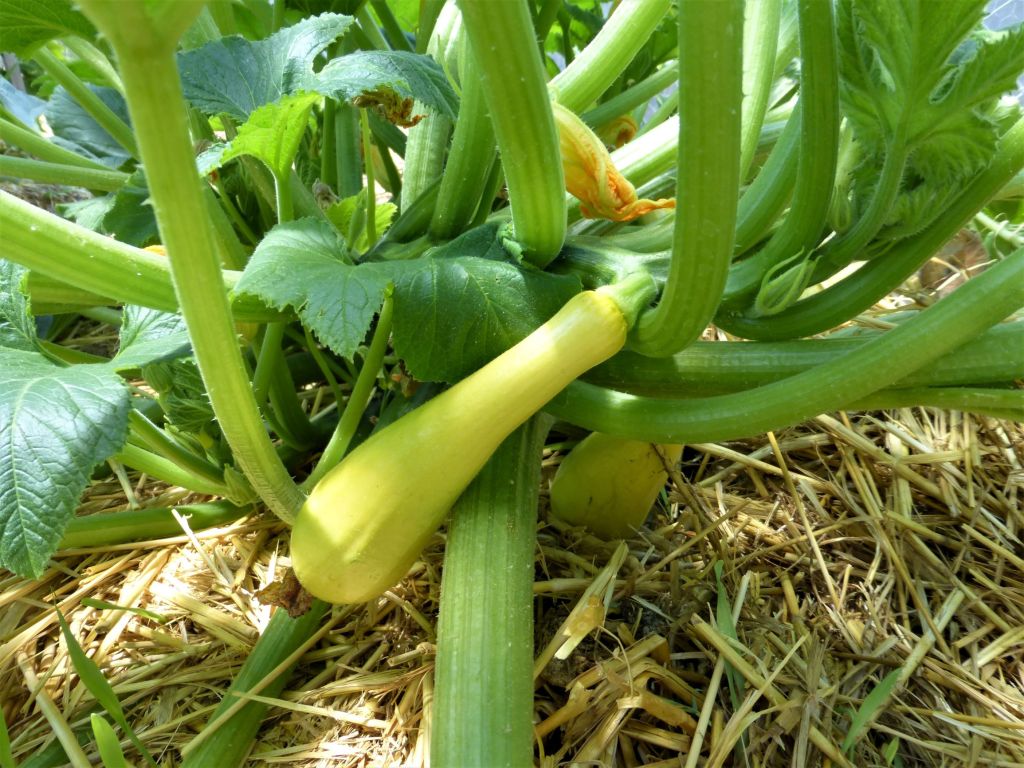
pretty little yellow squash 🙂
For the grasshoppers, which can utterly devastate the garden in no time, I put out NOLO bait, which is a targeted biological insecticide. It only affects grasshoppers and crickets, so it’s safe for the other animals and insects in the garden. I also hand pick and feed the grasshoppers to the chickens every chance I get.
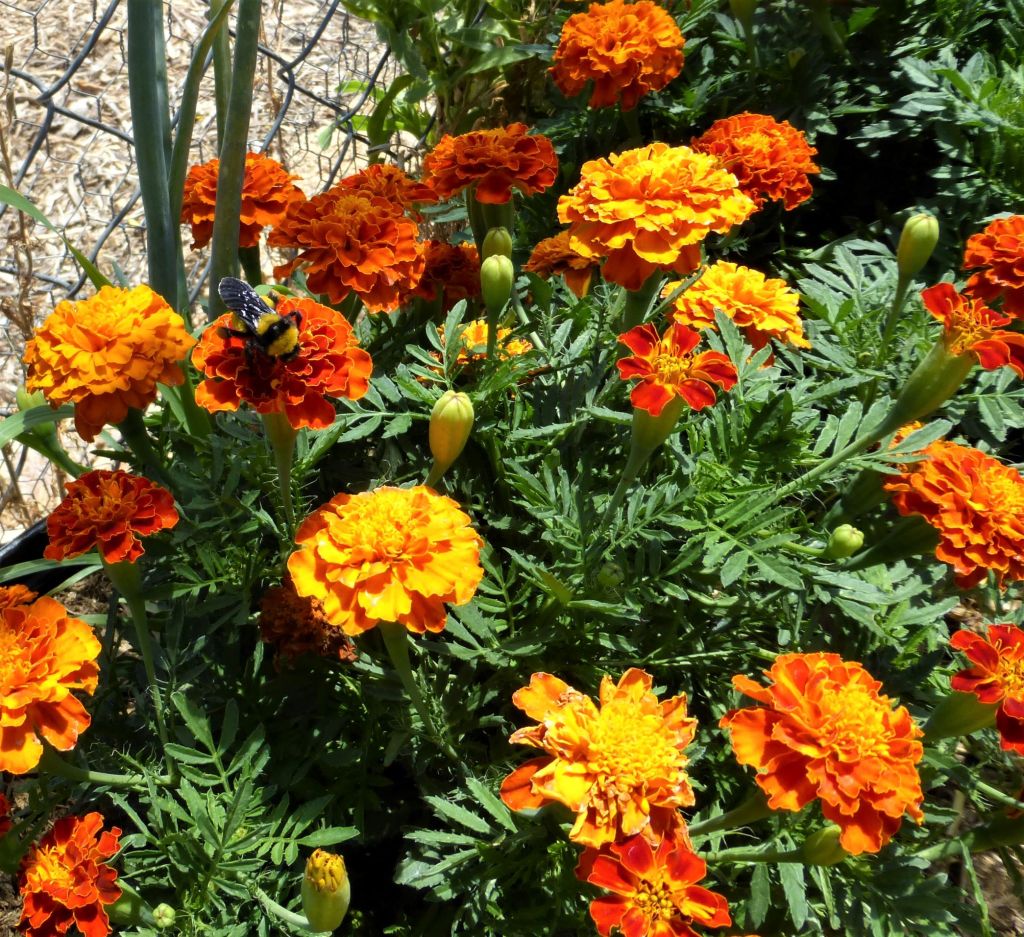
Marigolds for the bees and beneficial insects
One way I attract a host of beneficial insects into the garden is to have a variety of flowers throughout the vegetables. I have marigolds, sunflowers, nasturtiums, calendula, zinnias, and four o’ clocks, along with a few carrots and parsley plants that are flowering. I’ve never seen so many bees, wasps, parasitic flies, praying mantis, ladybugs, dragonflies, and more!
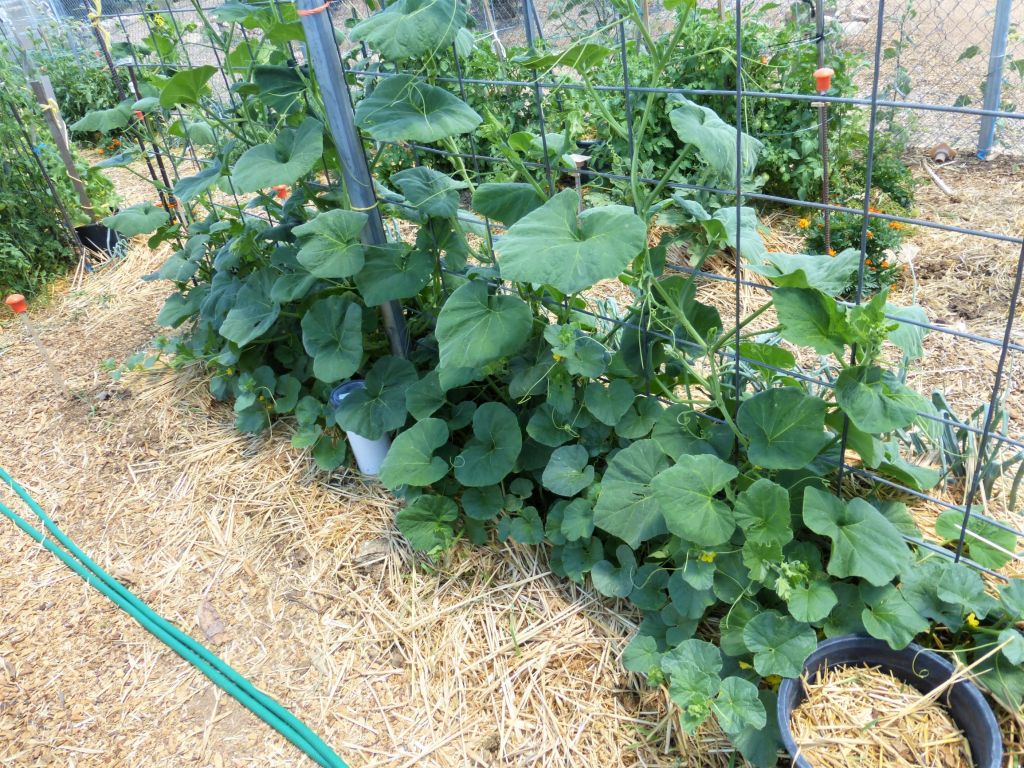
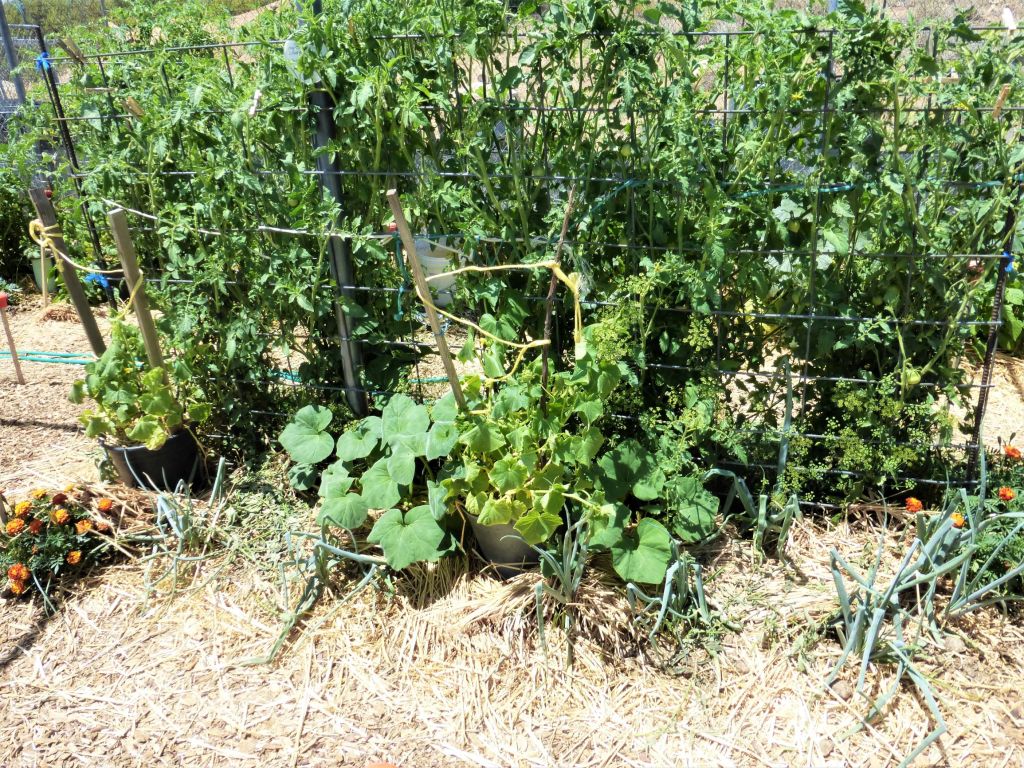
potted cucumbers and butternut squash
The cucumbers I planted in pots are doing pretty good and I’ve even got a few small cukes on the vines. At this point I’d be happy with anything I can get from them!
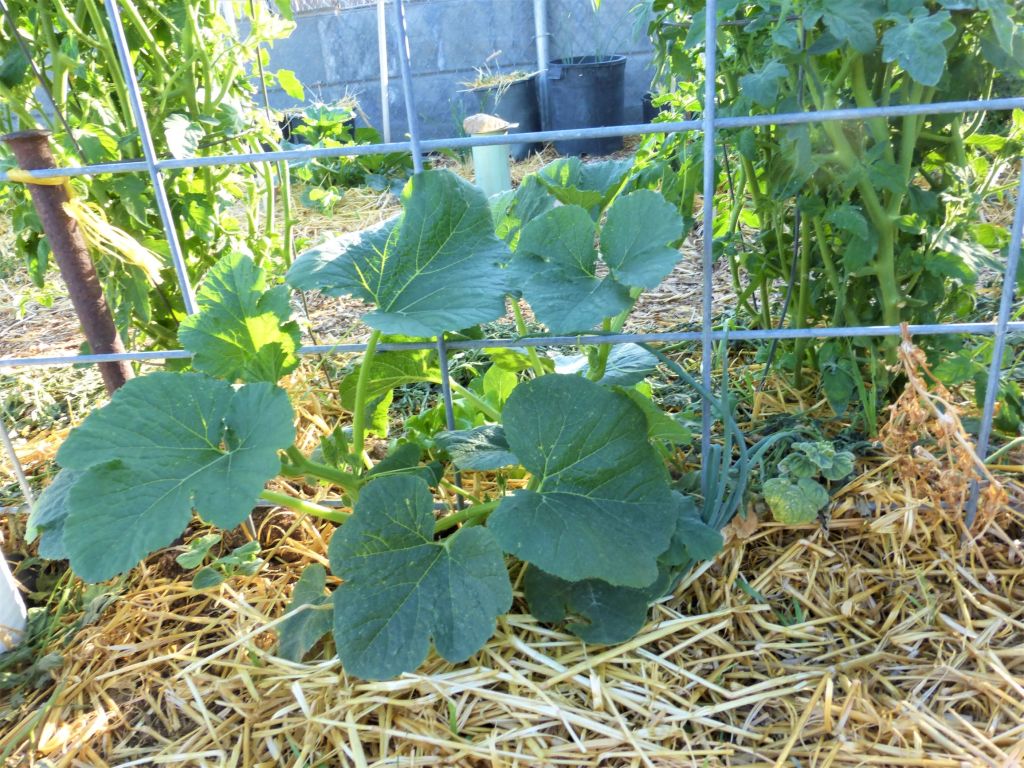
butternut squash and onions
The butternut squash are all doing good and have lots of squash on the vines. If they all reach maturity I’m going to have a lot of butternut squash this fall! I accidentally overplanted this spring, thinking the first batch of seeds wasn’t going to sprout. Turns out they all sprouted- they just took longer than usual. In the meantime I had started more seeds though, and they all came up as well. Then those mystery plants in the compost turned out to be butternut squash too. Good thing we like butternut squash!
So that’s what’s growing in the garden right now. Hopefully everything continues to do well as summer progresses.
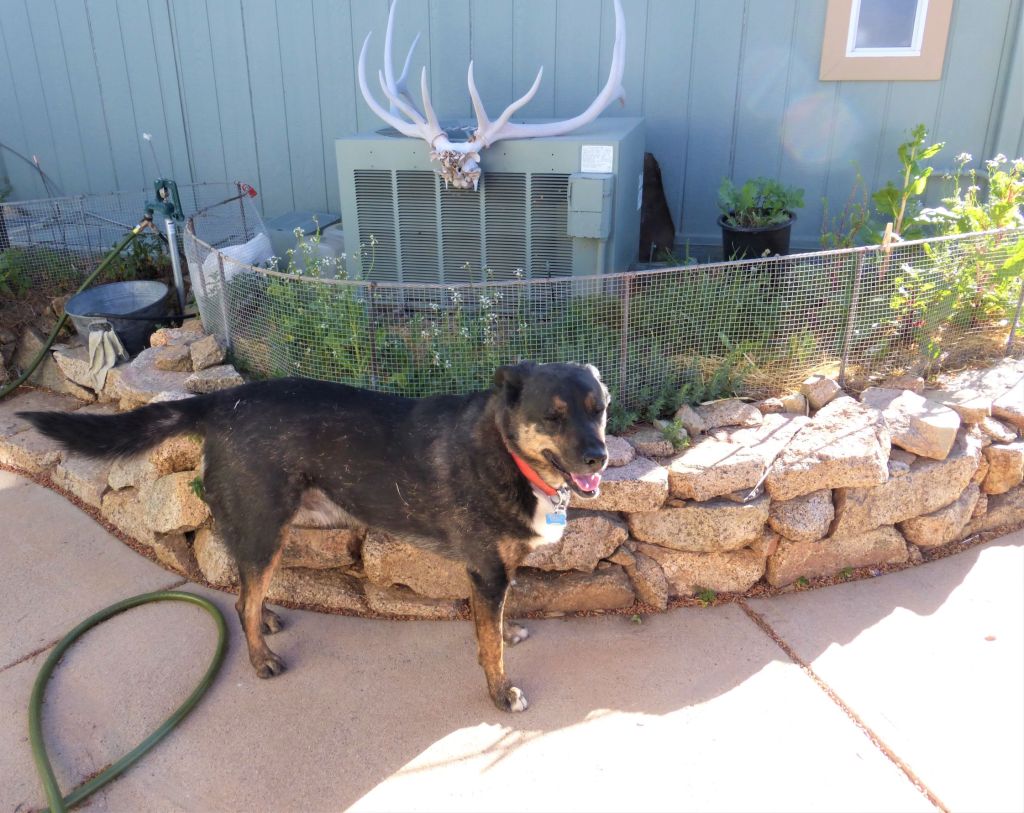
I was out in the back garden the other day when the powerful smell of skunk hit my nose. My first thought was “Where’s Dewey Dude and what’s he gotten into now?!” I know my dog, and I know what his response to seeing a skunk would be. “Oh boy! A funny looking black and white kitty! I wonder if he wants to play?”
I didn’t see the offending skunk, but there was no doubt that Dewey had seen him- that boy was ripe! And do you know the first thing he wanted to do when he came trotting up from the barn? Rub on Mommy! I don’t think so puppy- 6 feet back! Hey now, there’s a great tool for social distancing- skunk spray! LOL
Luckily I had a de-skunking dog deodorizing recipe handy. Dewey Dude hates getting a bath, so I put on his harness and wrapped his leash around a pole on the porch so he couldn’t run off. He may not remember that skunks themselves are bad news, but I have a feeling he’ll remember the bath that followed his skunky adventures.
Here’s the recipe that I used:
1/4 cup baking soda
1-2 teaspoons dish soap
2 cups warm water
1 cup apple cider vinegar
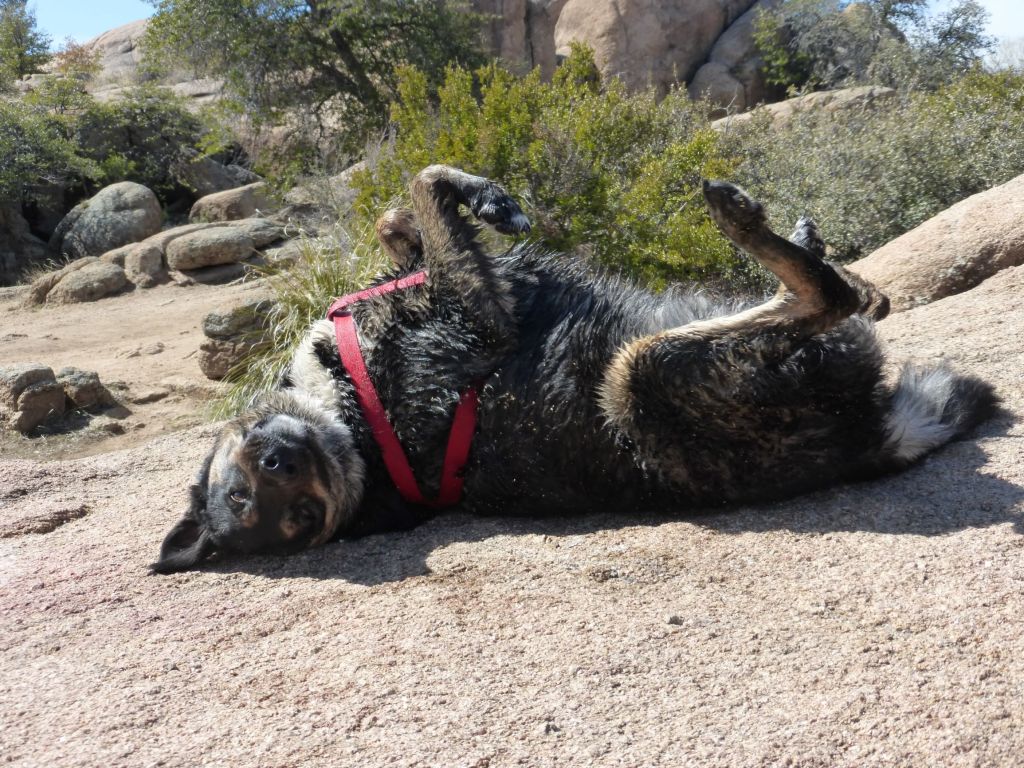
Mix all the ingredients in a bucket and use a soft rag to thoroughly soak the fur and rub in the mixture, starting at the area that was sprayed and moving outward. The Dude was hit on the neck, so I started with his head, carefully avoiding his eyes and nose and moved all the way down to his tail, using up all the solution (it can’t be stored and has to be used immediately). Let the solution sit on the dog for at least 5 minutes. This was probably the hardest part, with The Dude sitting there looking at me so pathetically like, “What did I do to deserve this?” 😦 After it’s had time to work rinse the solution off with warm water. I filled another bucket with warm water and slowly poured it over him, using a clean cloth to be sure I removed all the vinegar and baking soda. Then I dried him off and let him loose. Of course he promptly went and rolled in the dirt. *sigh* Well he was really clean for about 2 minutes. At least he doesn’t stink any more. By the way, I highly recommend doing this whole process outside if at all possible, and be sure to wear gloves, unless you want to smell like skunk too 😉
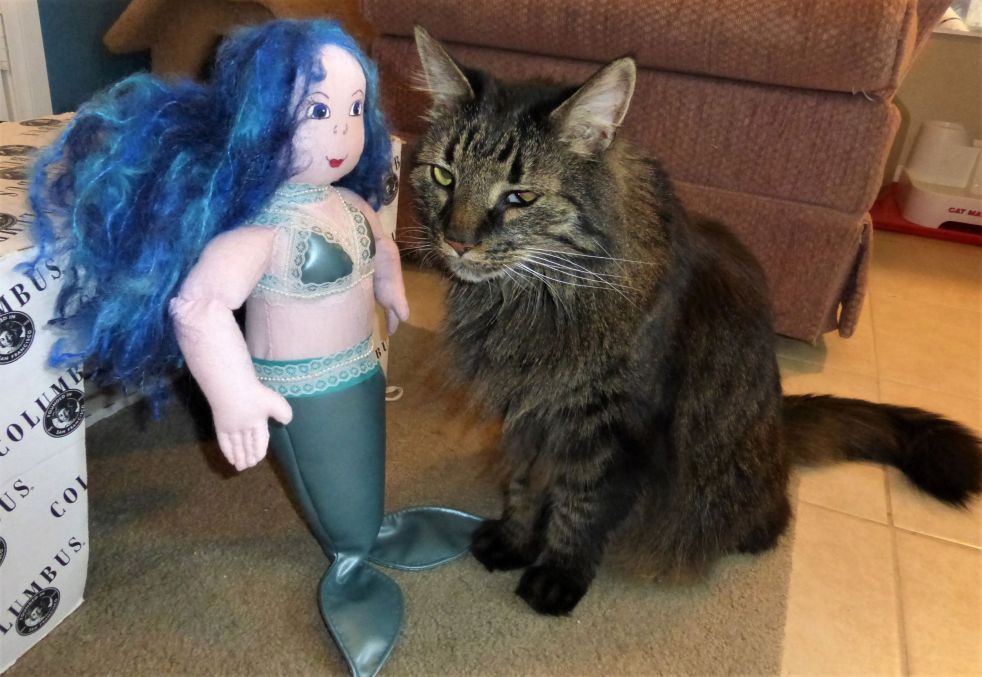
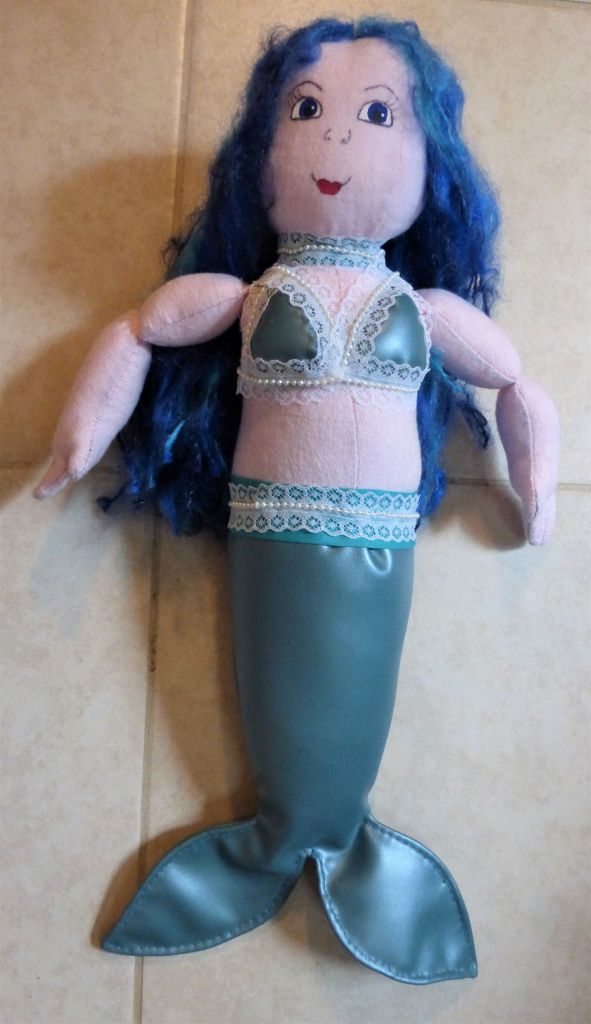
I recently made this cute blue mermaid doll as a gift for a little girl who loves mermaids. It took a couple tries to get it just right, but I’m really happy with the way she turned out.
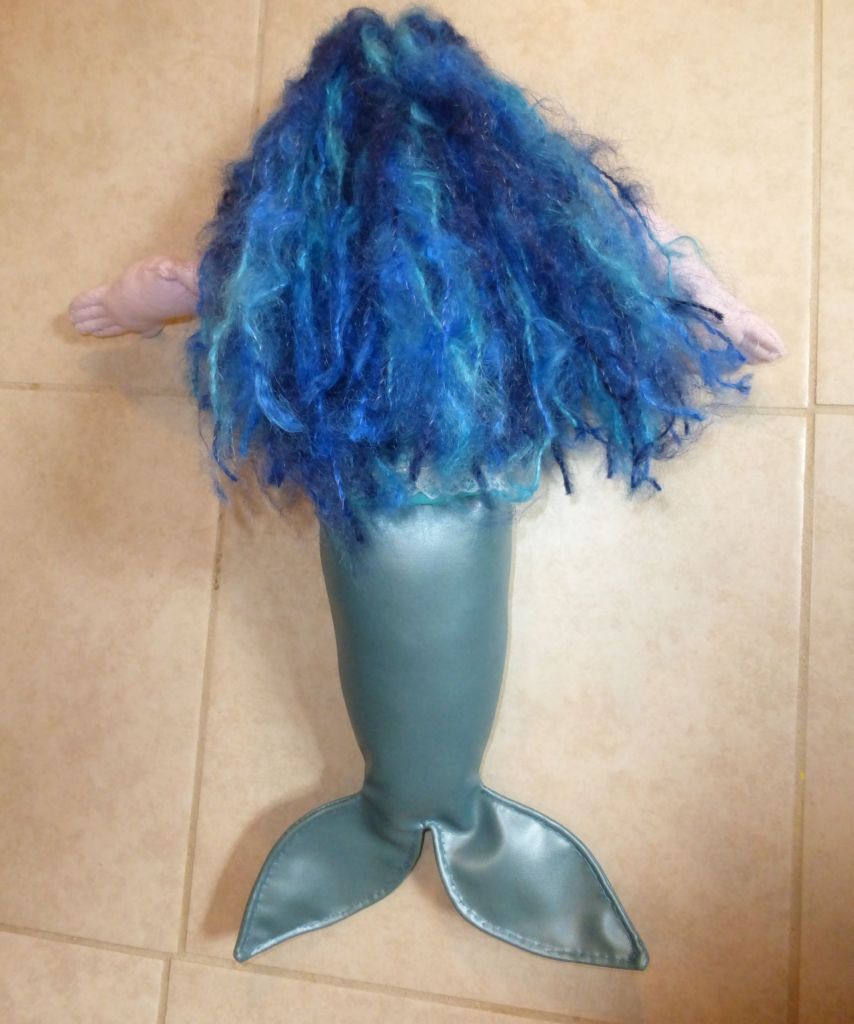
The doll was all sewn by hand and I mixed together a couple of different patterns for the head, torso, and and arms (from the book Cloth Dolls by Brenda Brightmore). I made my own pattern for the tail and used this beautiful metallic blue upholstery fabric, which is super soft and almost feels like lambskin leather.
The yarn I used for the hair is silky soft and was appropriately named Waterfall. Naturally my mermaid had to have long luxurious BLUE hair 😉 (But seriously, it took me forever to decide which yarn to use- I’ve collected quite a stash of pretty and unique yarn over the years.)
I painted her eye and lips with acrylic paint. I must admit, I’m kind of proud of the face- I did this totally free hand, and usually I have to try several times to get everything just right and even. I guess I was really in the zone when I did this one 😉
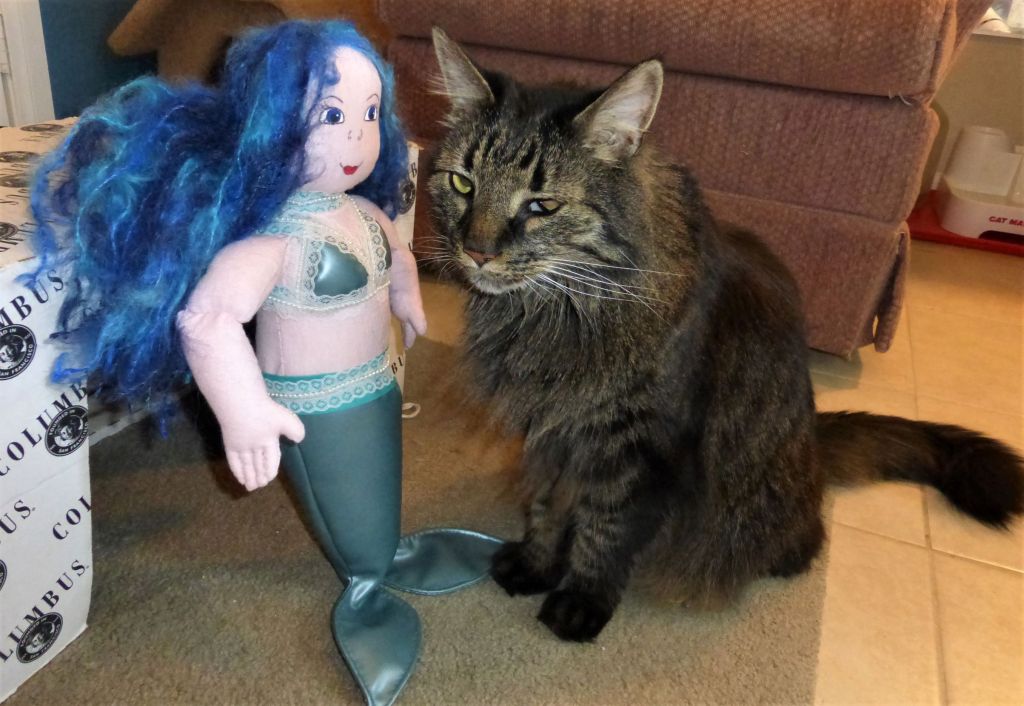
Calcifer meets a mermaid 🙂
Of course Calcifer helped with the creation of this cute mermaid and gave his final approval. I don’t know how I could create anything without my fluffy supervisor’s assistance! He likes helping me pick out the fabric, yarn, and embellishments and has to have his say in everything 😉
“Looks good to me- I approve!”
And so, receiving Calcifer’s purr of approval, I wrapped up my little blue mermaid and sent her off to make a sweet little girl very happy on her birthday 🙂
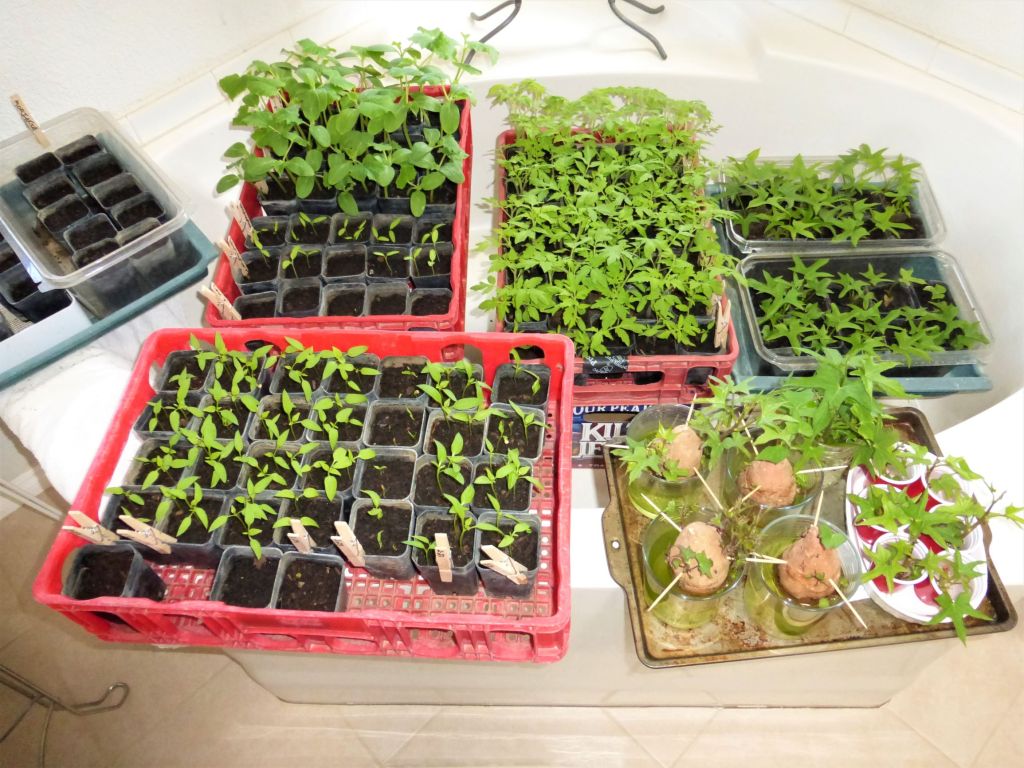
Gardening season is in full swing and things are looking pretty good this year. I started my tomatoes, peppers, eggplants, and sweet potatoes in the house in late February. I kept them in the bathroom, which is nice and cozy warm and has a good level of humidity, so I had excellent germination. Once the seedlings started getting bigger I began taking them out to the greenhouse during the day, then bringing them back inside in the evening when the temps dropped.
Here I’ve got my tomato, pepper, and eggplant seedlings, along with my sweet potato slips
Once the night time temps were around 50 degrees I left the seedlings in the greenhouse full time. If the temps dropped below 50 I covered them with a row cover. I also had them surrounded with glass jugs full of water which absorbed the heat of the sun during the day and slowly released it at night (sort of a greenhouse within the green house 😉 ).
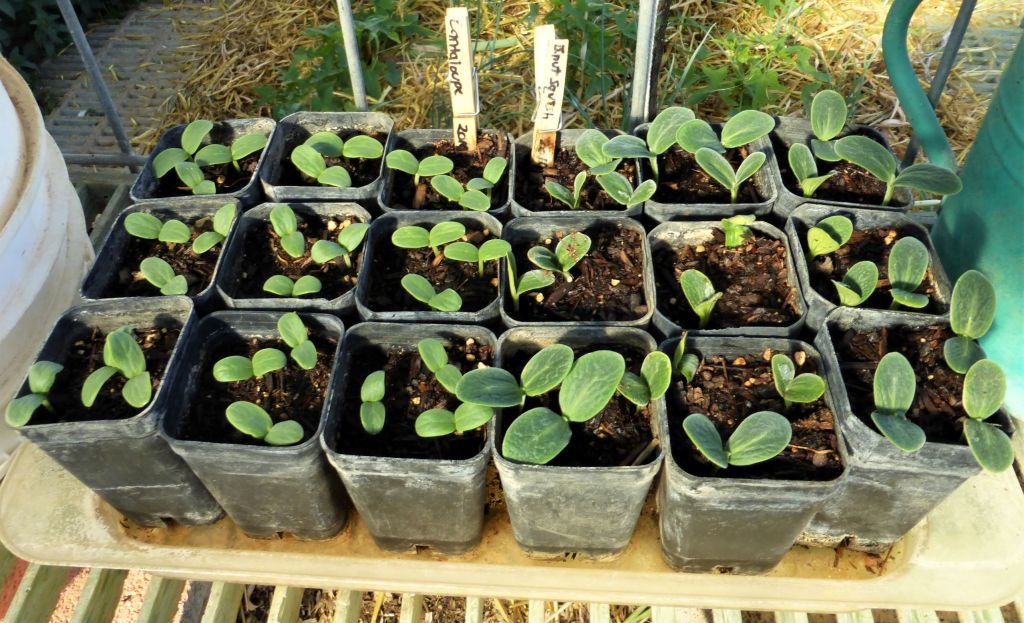
These are my butternut squash and cantaloupe seedlings, planted later than the others because they grow so quickly.
By March the garden beds were all set up and ready for planting. For the first year I’m trying no till gardening in the big garden. I put down a thick layer of compost over each of the beds and planted right in that, then mulched heavily with straw. I’ve certainly got tons of worms, and the soil is rich and loose- no need to even use a trowel or shovel- I just used my hands to gently move the soil enough to make a space for the plants.
One of my mini Bell peppers
The tomatoes did really well and I think I only lost one or two after transplanting. There always seems to be at least a few casualties. The peppers really struggled at first though. I think the soil was colder than I realized, and peppers need warm soil to thrive. Eventually they perked up though, and those that survived are doing well now and even flowering. I planted some Banana peppers in pots and they’re doing really well, in part because the soil in the pots is considerably warmer than the soil in the beds. I’ve also been fertilizing with Epsom salt every two weeks- that really perks up the veggies!
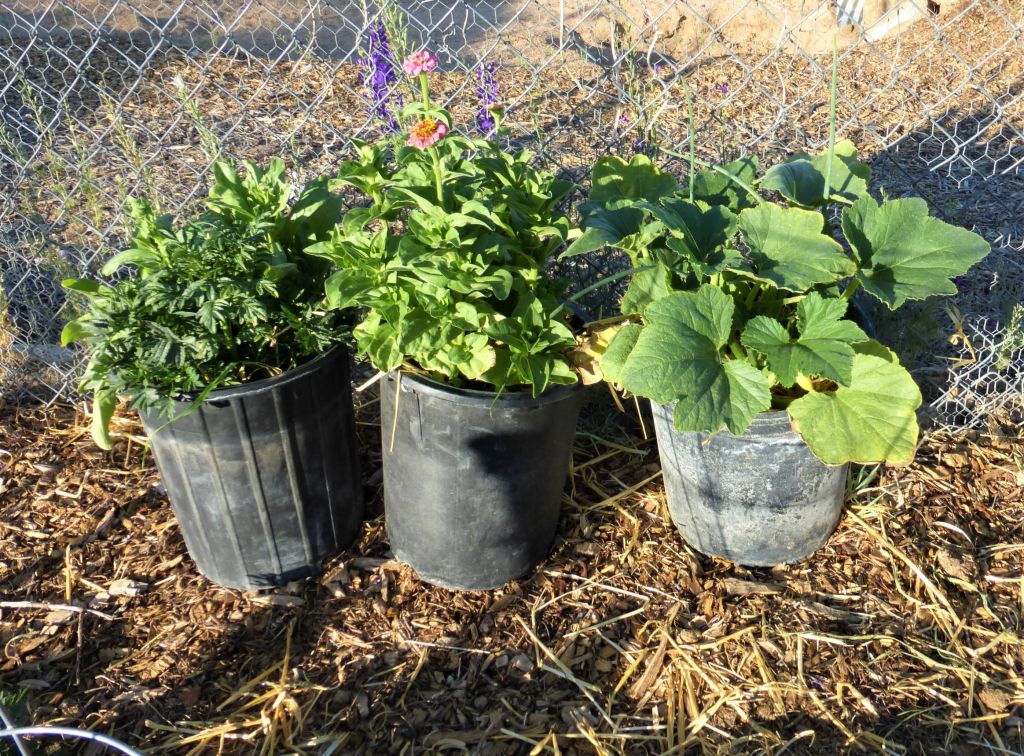
Pots with marigolods, Calendula, zinnias, and yellow squash.
I planted a lot more things in pots this year, and overall that’s working out really well. The zucchini and yellow squash that I planted in pots sprouted and grew faster than those that I planted in the ground (once again, probably due to warmer soil). I planted lots of flowers in pots and as they start flowering I’ve been putting them in various areas of the yard where I’ve had difficulty getting seeds to survive in the ground.
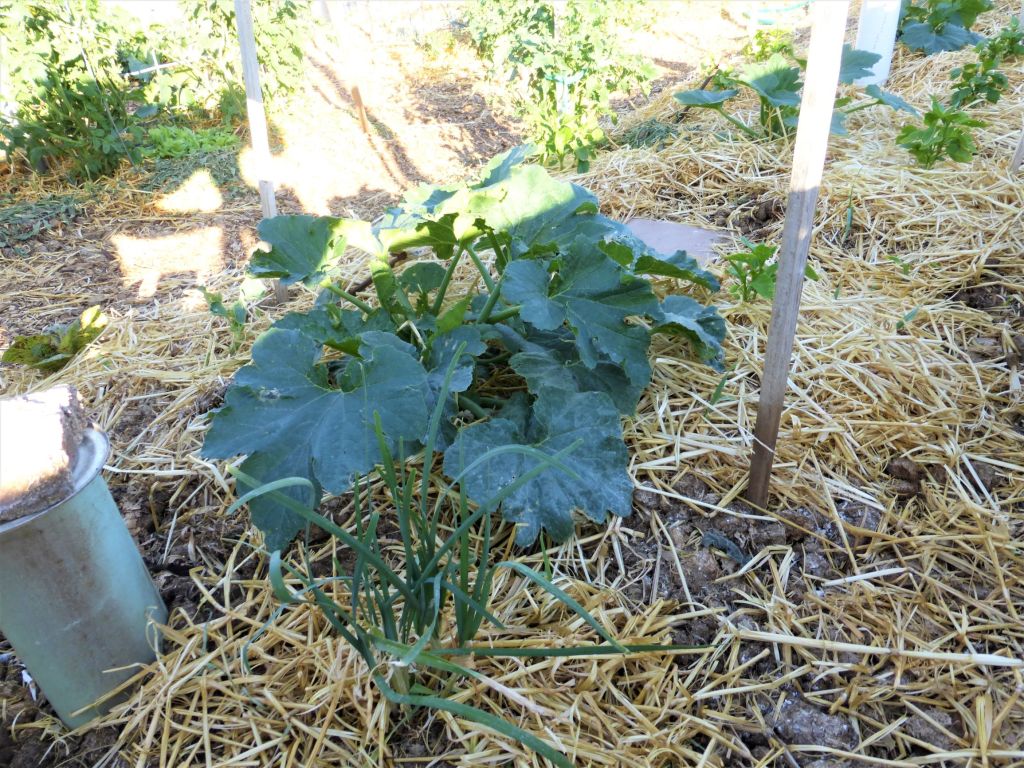
Zucchini’s doing well!
Above you can see that the zucchini (with chives in front) is doing well. All the zucchini and yellow squash have fruit now (I’ll probably be able to pick my first yellow squash tomorrow!). I’ve been fertilizing with Chicken Poop Soup once a month and Epsom salt every 2 weeks and the plants have been thriving.
“Recipe” for Chicken Poop Soup: 1) Rake out the chicken yard and put the chicken manure in a 5 gallon bucket. 2) Fill bucket with water and stir well. 3) Cover and let sit and ferment for a month, stirring occasionally. 4) Strain the solids, dilute well (I dilute one 5 gallon bucket of pure soup to make 4 buckets of diluted fertilizer). Water plants with the diluted soup, trying to avoid getting it on the leaves. I spray the plants with the hose to make sure none of the leaves get burned. So far I haven’t had any issues.
One warning: this stuff STINKS! But the plants love it 😉
Potatoes in pots
This year I planted all my potatoes (Yukon Gold and Gold Rush) in big pots filled with compost. They sprouted faster than ever before and are absolutely thriving! I can probably start harvesting potatoes any time now. I also had a bunch of potatoes from last year come up in the raised bed along with the sweet potatoes I planted.
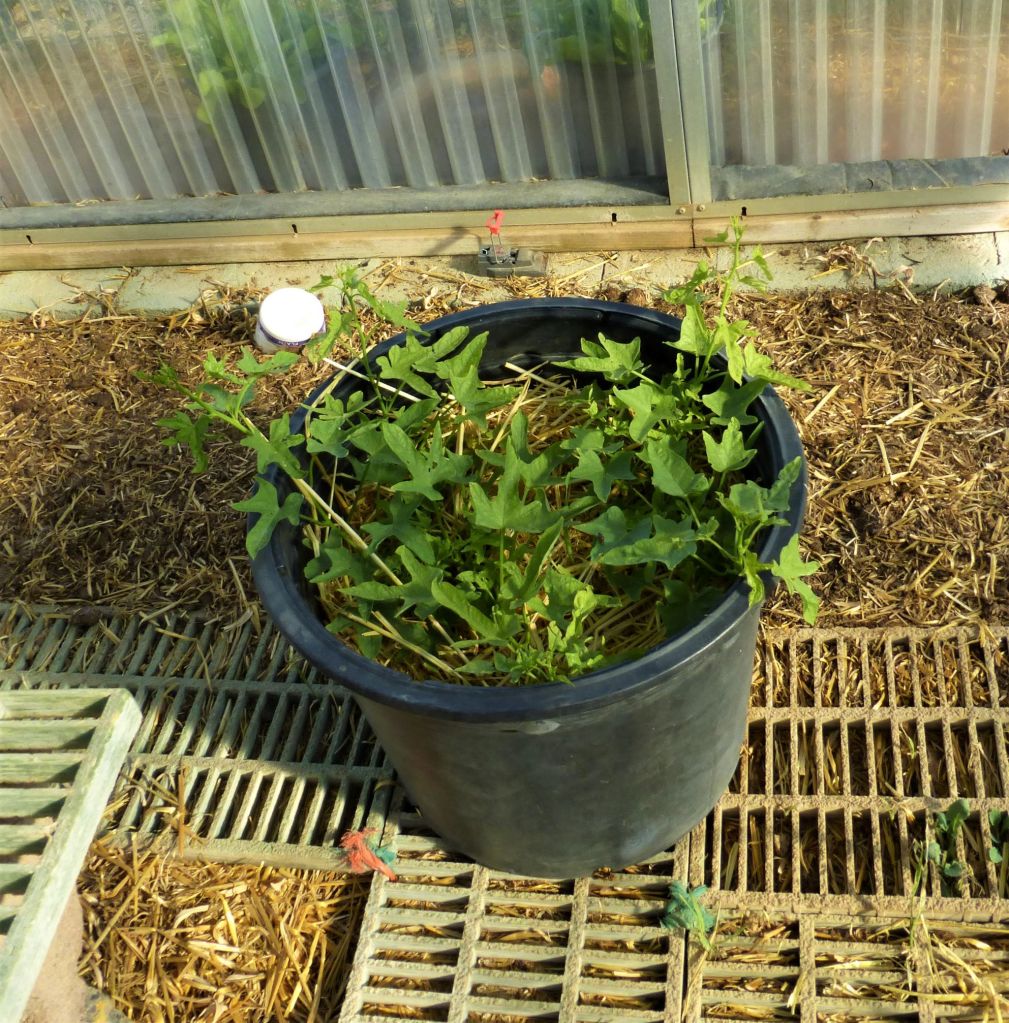
Sweet potatoes in pot in greenhouse
I ended up with a ton of sweet potatoes this year (I lost count after 40 slips 😉 ), so I’ve got them planted all over. Some are in pots in the greenhouse, which are doing really well, some are in raised beds outside, and some are in the ground in the greenhouse. The ones in the greenhouse are doing the best. They’re another heat loving plant, so they’re perfectly comfortable at 100 degrees or more, just as long as they have enough moisture and mulch. This year I’ve really been going heavy on the mulch, and even when the outside temps have approached 100 there was minimal wilting and signs of heat stress, and the soil was still nice and cool.
My amazing super awesome Trout Speckled Buttercrunch cross lettuce
Now this lettuce above is the most awesome lettuce I’ve grown yet. I planted the seeds in late September last year, then forgot about them when nothing came up for a month. These were from seeds I’d saved the previous year. Then in JANUARY I noticed a few tiny lettuce sprouts, and thought “Oh cool, I might get a few plants out of this after all”. So I covered the area with a row cover and forgot about it again. I didn’t have much hope for a very good harvest, as temps were dropping down to the teens at night. When I finally took the row cover off in late February I saw a whole row of beautiful Trout Speckled Buttercrunch lettuce (my Trout Speckled Romaine crossed with my Buttercrunch)! These plants have survived temps down to 14 degrees, and up to 97 degrees!! Not to mention winds up to 30 miles an hour for DAYS STRAIGHT! And although they were tough enough to survive those extremes (not to mention rather infrequent watering and a bit of unintentional neglect) the leave are thick and soft and succulent. You better believe I’m saving seeds from these beauties! They just started going to seed last week, so clearly they’re very slow to bolt, which is a definite plus in this hot climate.
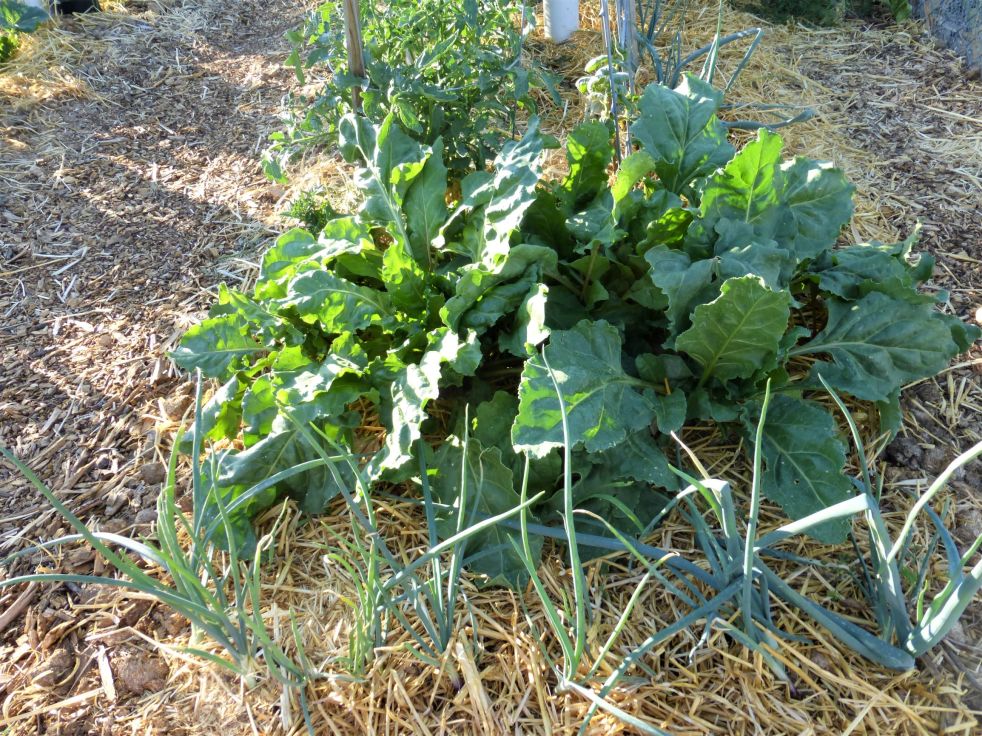
beets and onions
This year I’v e done a lot of random planting and companion planting. There are a few benefits to this method versus planting large areas with a single type of vegetable. The plants seem to do better in small groupings, and if one area gets hit by bugs or disease, at least I won’t lose ALL of my zucchini, or tomatoes, or whatever else I’ve got. Interplanting also helps to confuse the bugs. It makes it harder for them to find their target food plant. This is also where companion planting can really help. Marigolds and nasturtiums are good companions for most vegetables, as are onions and garlic. They help to repel the bad bugs and encourage the good bugs.
The spaghetti squash looks great!
One thing I’ve had a hard time growing successfully is cucumbers. I started them in pots in the house, then moved them out to the greenhouse when the weather got warm enough and they did really well until I transplanted then into the garden. Most of them have died now 😦 In the picture above you can see a really healthy spaghetti squash and a tiny sad little cucumber plant next to it. I tried planting the cukes in several different places and only 4 or 5 look like they might make it.
Cucumbers in pots and zucchini and yellow squash
I did start a second batch of cucumbers in pots, and so far they look pretty good. Hopefully I’ll be able to get something out of them!
pole beans are off to a good start
Some of my beans are doing really well, while others were eaten before they even sprouted through the soil. Between the bugs and the critters it’s a real battle to keep things alive. I had to start more butternut squash seeds because the first batch was eaten by bugs just as it sprouted. Mice have been pretty destructive too, so I’ve been putting traps out wherever I spot damage. I use Neem, Diatomaceous Earth, and hand picking to control the bugs, as well as encouraging beneficial insects and animals to live and hunt in my garden. I have LOTS of lizards in the garden, along with toads, and ladybugs, lacewings, and wasps. The flowers help to attract the beneficial bugs and the mulch also gives them a place to live. Oh yeah, I’ve got lots of ground spiders this year too. I also have a birdbath on the ground so the lizards, toads, and bugs have a supply of fresh water.
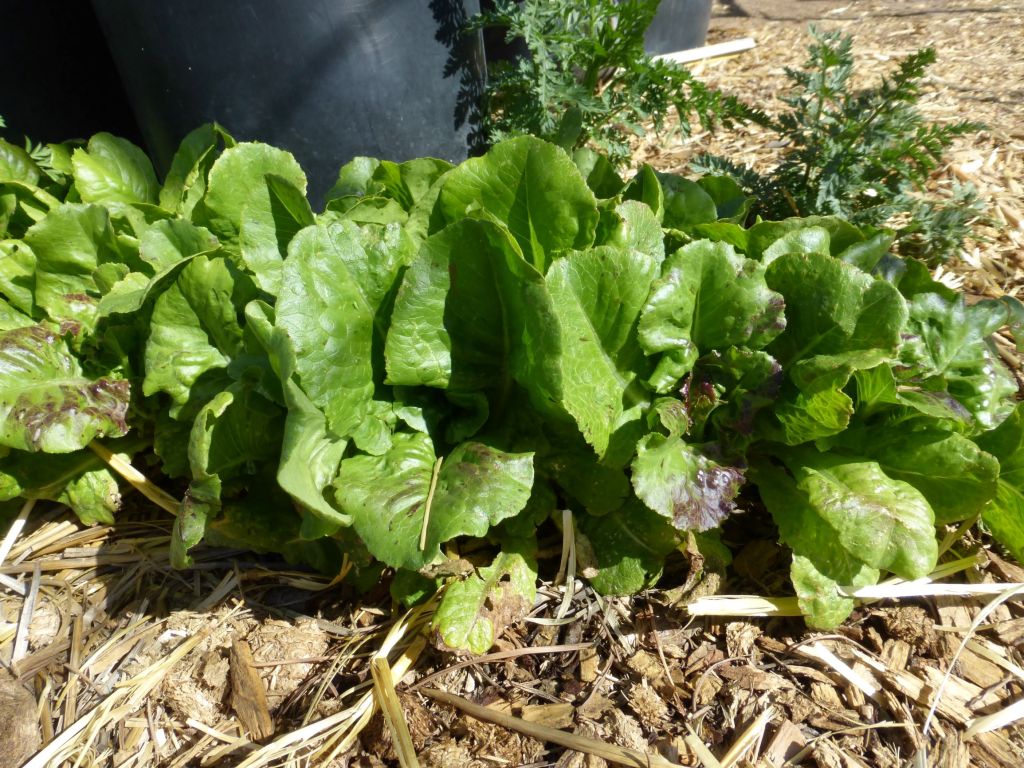
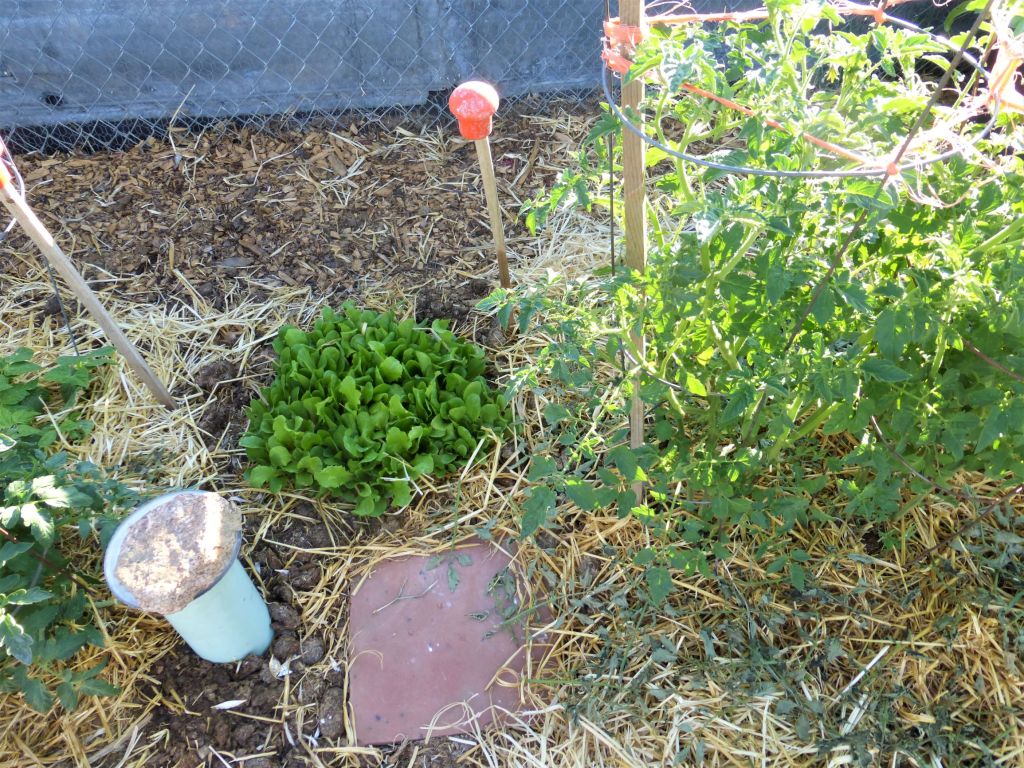
lettuce planted in the shade of a tomato
Above is another example of my random planting this year. I found small shaded spots under or behind the tomatoes and planted little patches of lettuce and greens. Surprisingly I’ve still been able to harvest lettuce even though the temps have been well into the 90’s every day.
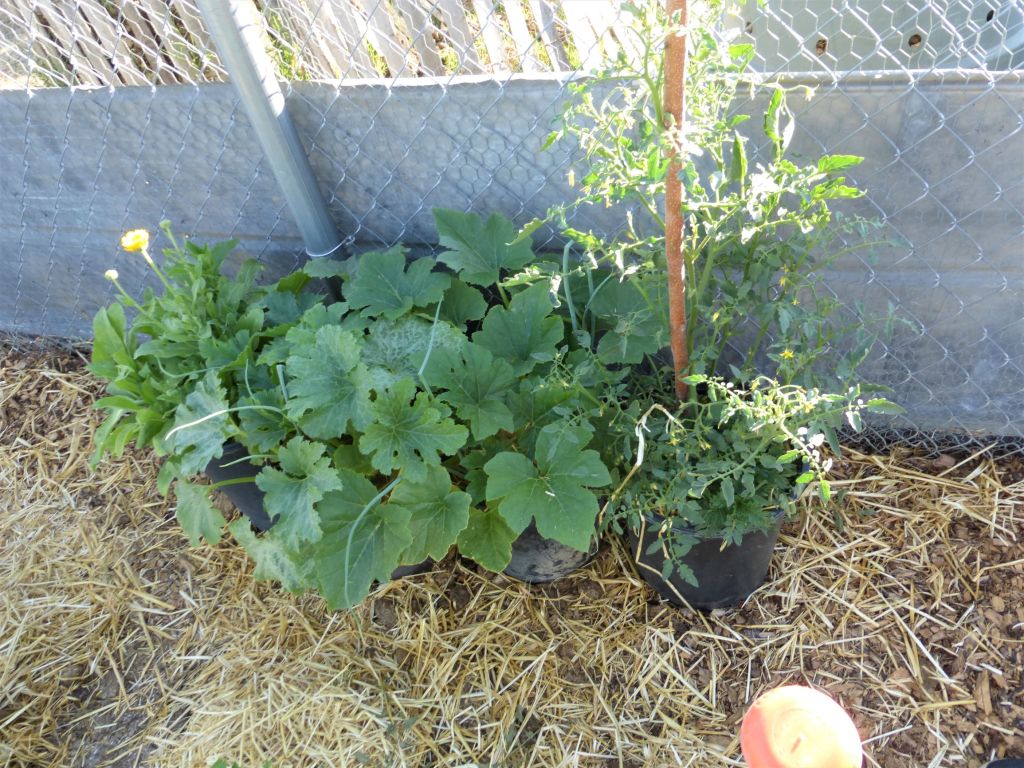
My stray “compost tomato” , zucchini, yellow squash, and calendula in pots.
Last fall I filled a bunch of pots with compost to put in the greenhouse and add some heat (they get really toasty in the sun!). I got a nice surprise early this spring when the tomato plant above spouted (don’t know what kind of tomato it is yet, but it’s doing really well and got flowers before any of the other plants). I love my “strays”- those plants that pop up on their own and seem to be stronger, more resilient, and more productive than the seeds that I planted intentionally. I’ve got a couple stray lettuce plants that have been providing leaves for the salad for months now. I’ve got a few stray tomato plants that popped up in the garden as well.
All in all things are doing really well, in spite of the intense heat and wind, not to mention the bugs and varmints (you wouldn’t believe how much the rabbits, mice, rats, and squirrels can devour!). It may sound silly, but I’m proud of my garden ❤ It takes a strong, resilient plant to survive and thrive around here, and my plants are putting on one heck of a show!
Thanks for stopping by- hope you enjoyed this little peek into my personal Garden of Eden 🙂
Since I took yesterday off from working out to go shopping (first time in 2 months- quite an experience!) I figured I’d hit it hard today. This hour long sweat session covers all the bases, and I love how the cardio is adaptable to whatever equipment you have, or even no equipment if you just want to do floor cardio or walking.
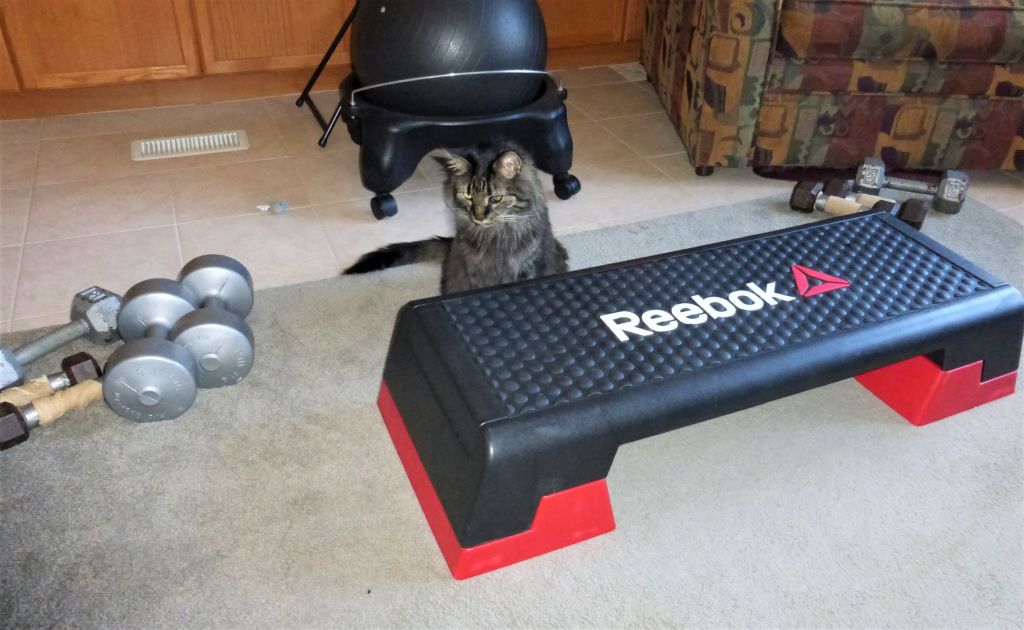
Calcifer’s ready to do some step and strength!
Angie broke this one up into 10 minute cardio sections and 10 minute strength sections. I chose to use my step and the coffee table for some serious lower body toning and to really get my heart rate up. Naturally my fluffy workout partner was there to keep my motivation high 😉
The strength sections called for medium to heavy weights, and included body weight moves as well. As with all of Angie’s live workouts, a warm up and cool down were included. For some extra stretching I added on some lovely and relaxing Yin yoga for the lower body, which felt great after all that step cardio!
I hope you’re all doing well out there- staying fit mentally, physically, and spiritually. I just can’t say enough about the benefits of a regular exercise program that includes cardiovascular conditioning, strength work, stretching, and deep breathing. We only get one body, and in the end we’re the ones in control of our health and how we treat that body.
This fun fantasy dragon candle holder was sculpted by hand in Premo polymer clay and is a one of a kind creation. The three inch tall dragon was sculpted from a custom mix of blue sparkle and green Premo polymer clays. His belly scales, horns, and spines were sculpted from a mix of pale yellow and glow in the dark clays. After being exposed to bright light for several minutes these parts will glow in the dark.
The base of the candle holder is green polymer clay and is covered in yellow, red, orange, and pink polymer clay flowers and green leaves. The bottom of the base is covered in green felt and measures five inches at the widest point.
The actual candle holder is a two inch tall, 2 1/2 inch wide glass jar that I’ve recycled. I wrapped the top edge in pale blue polymer clay.
The dragon’s eyes were made from green sparkle polymer clay and he even has a tiny red tongue and tiny white fangs. His skin has been textured as well.
This candle holder was inspired by Spring flowers and my love of fantasy, and dragons in particular. This is a very happy dragon, who loves lounging in the pretty spring flowers 🙂
This piece is available for sale in my ArtFire shop. Each of the pictures are linked to the listing.
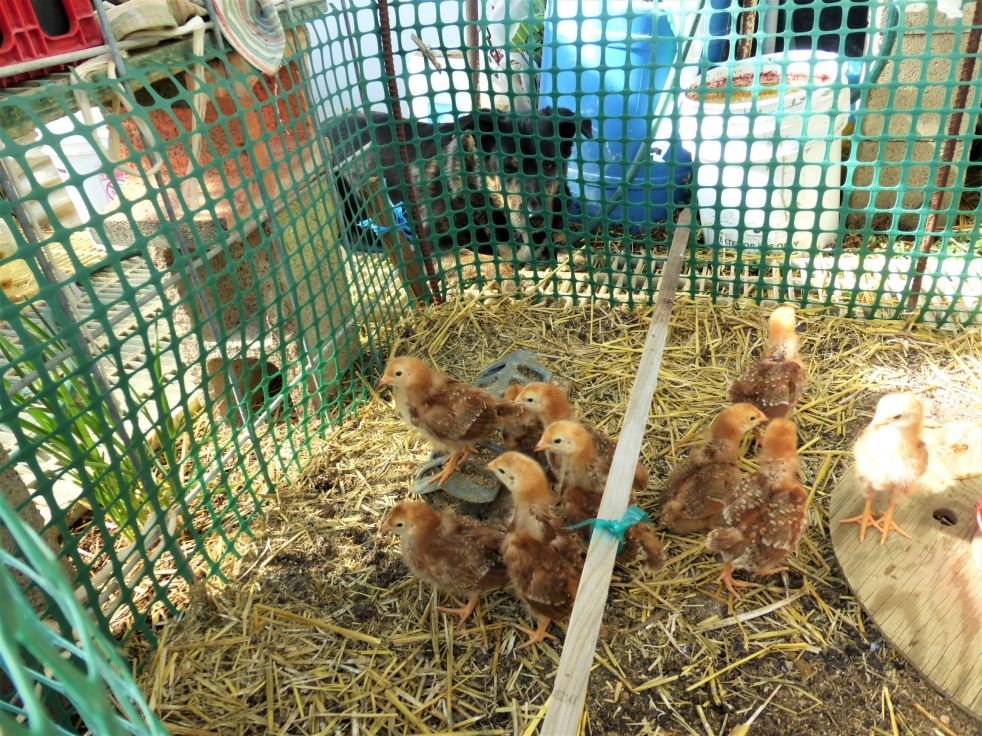
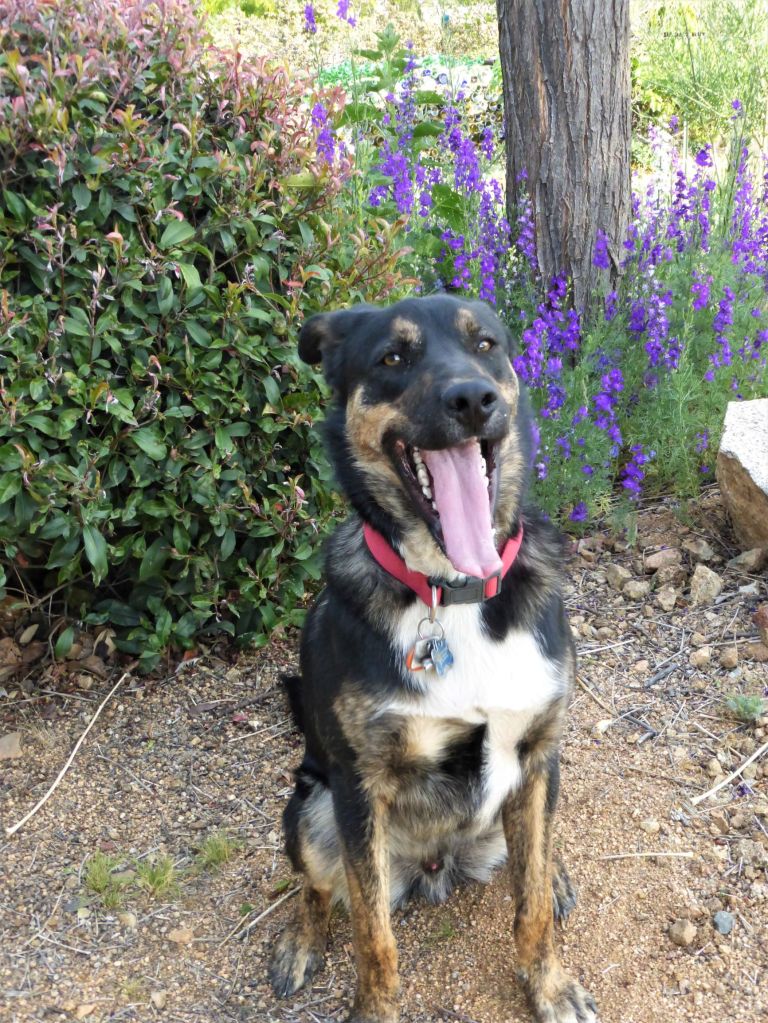
It’s that time of year again- time for Spring chicks! I got my day old Rhode Island Red chicks about a month ago and Dewey Dude has been helping me take care of them from day one. He loves the little fluffy baby chicks and is so gentle with them. I’ll hold one of the chicks for him to smell and he’ll give her tiny gentle kisses on the cheek. He is just the most loving dog I’ve ever known! (He’s great with the cats too)
The chicks are growing fast and I wanted to give them more room to stretch their wings and play, so I fenced off an area in the greenhouse where I just pulled the old lettuce and hadn’t planted anything new. This was the first time the chicks had been out in the sunshine and felt dirt under their feet. At first they weren’t sure what to do with all this freedom and space, so they didn’t go too far from the food. It didn’t take them long to get comfortable though. Within a few minutes they were running around (chicken zoomies!) flapping their wings and having lots of fun.
I let them play out in the greenhouse during the day, frequently checking on them, with Dewey Dude’s assistance, of course. So far I’ve only had one chick get out of the enclosure, and Dewey Dude came and told me a chick was in trouble. I heard her squawking as I approached the greenhouse. She was up against the fence, just trying to get back in to be with her sisters. I made the fencing more secure (she had slipped out under the fence) and I have the row cover on top to keep them from flying out. I haven’t had any more escapes so far. Dewey Dude keeps a good eye on the chicks though, and I’m sure he’ll let me know if they’re in trouble.
In the evening, as the temps start to drop (before it gets too cold) I load the chicks back into their carrier and take them back to their cage with the heat lamp in the garage. Dewey Dude leads the way, prancing along, tail held high, like he’s doing the most important job in the world. Once in the garage he watches very closely as I put each chick back in the cage. I always let him kiss at least one of them 😉 Whenever I go out during the evening to check on them that hard working dog has to come with me, even if he was sleeping. It’s his job to protect those chicks, and he takes his job very seriously. And the chicks quickly come to love Dewey and see him as a bit of a Mamma Hen. They’re not scared of him, and actually seem comforted by his presence. And that continues even as they grow to maturity. Dewey hangs out right in front of the chicken coop, and a bunch of the hens will be laying right up against the fence, as close to the dog as they can get. So far Dewey’s raised four batches of chickens.
I surely was blessed when this wonderful dog came into my life! He brings a smile to my face every single day, no matter what else might be going on.
All seasonings are to taste, which is why I didn’t put measurements.
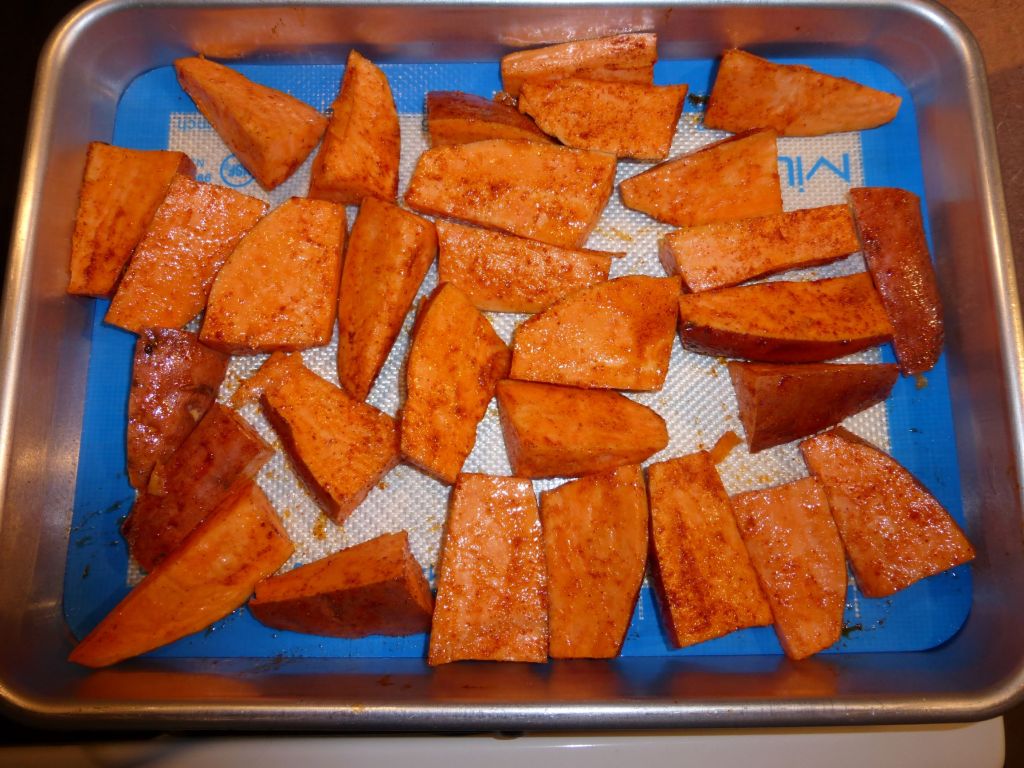
For the sweet potatoes:
2-3 medium sweet potatoes, cut lengthwise into wedges
olive oil for coating sweet potatoes
garlic powder
smoked paprika
Put sliced sweet potatoes in a bowl and drizzle with olive oil. Mix to coat, sprinkle with seasonings and mix again. Spread the sweet potatoes in a single layer on a cookie sheet.
Bake the sweet potatoes at 400 degrees for 20- 25 minutes, stirring occasionally. After 10 minutes put the salmon and asparagus in the oven so everything finishes at the same time.
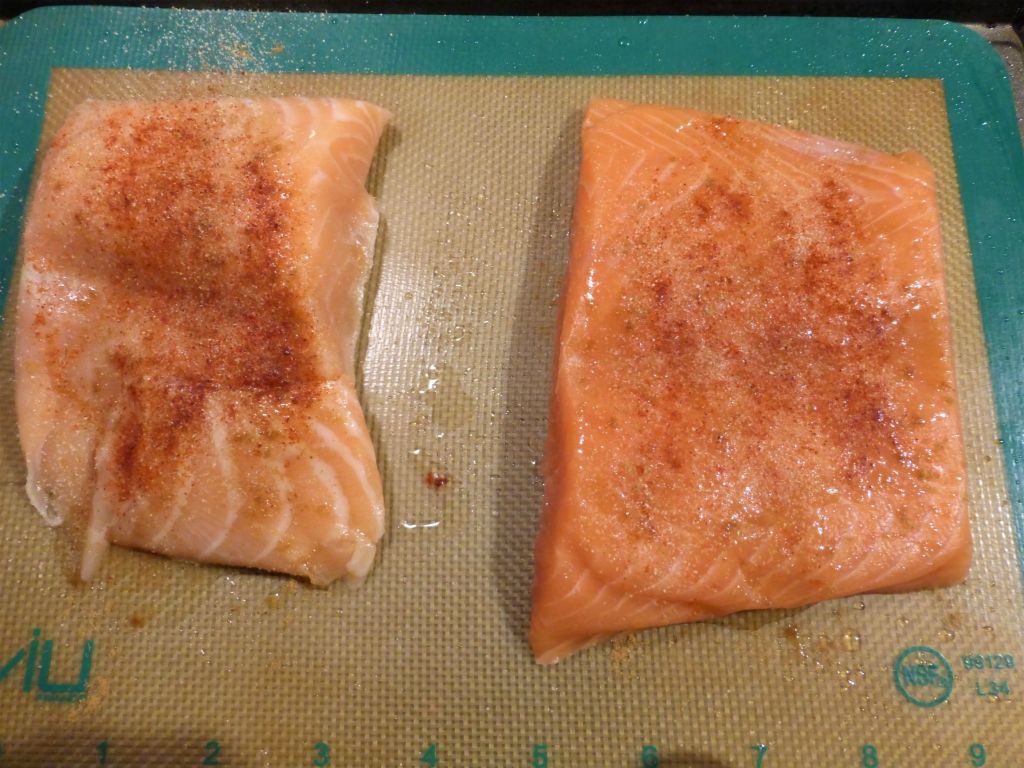
For the salmon:
2 servings of salmon
olive oil
garlic powder
onion powder
smoked paprika
powdered cumin
Pat salmon dry and lightly coat both sides with olive oil and sprinkle with seasonings
Bake at 400 degrees for 10- 12 minute
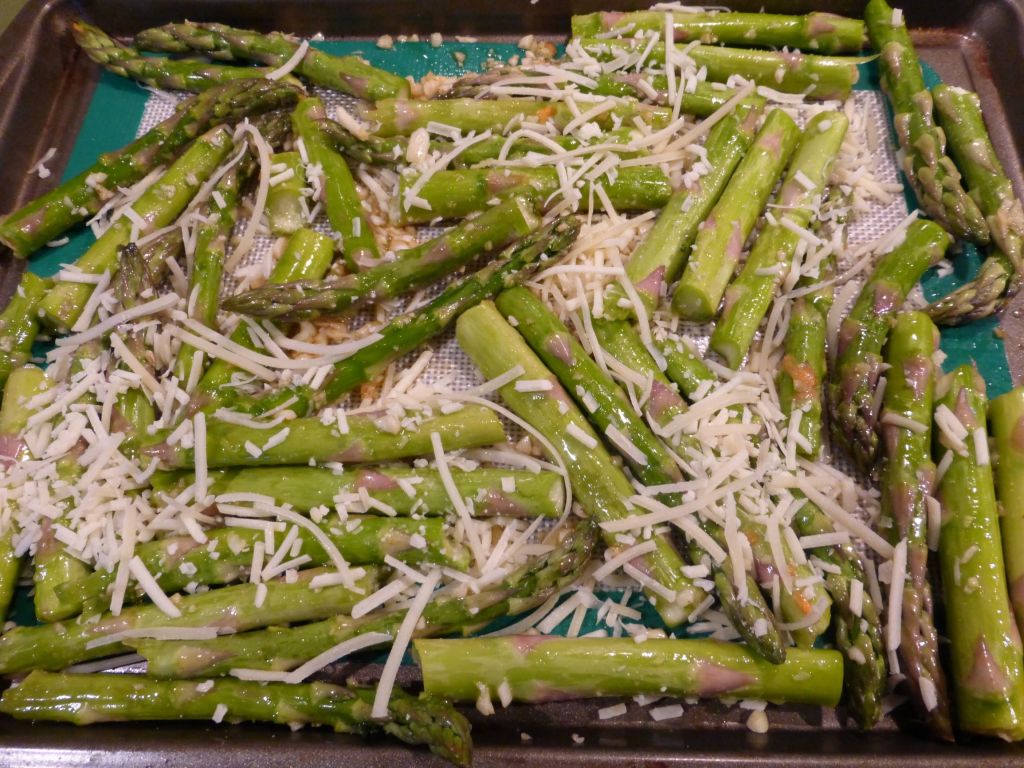
For the asparagus:
1 bunch of asparagus
olive oil to coat asparagus
Parmesan cheese to sprinkle over asparagus
minced garlic to taste
1 tsp. salt
Place asparagus in a bowl and drizzle with olive oil. Toss to coat then sprinkle with Parmesan, garlic, and salt. Arrange asparagus in a single layer on a baking sheet and bake at 400 degrees for 12 – 15 minutes.
This can be served over brown rice or quinoa and makes a simple, healthy, and delicious meal.
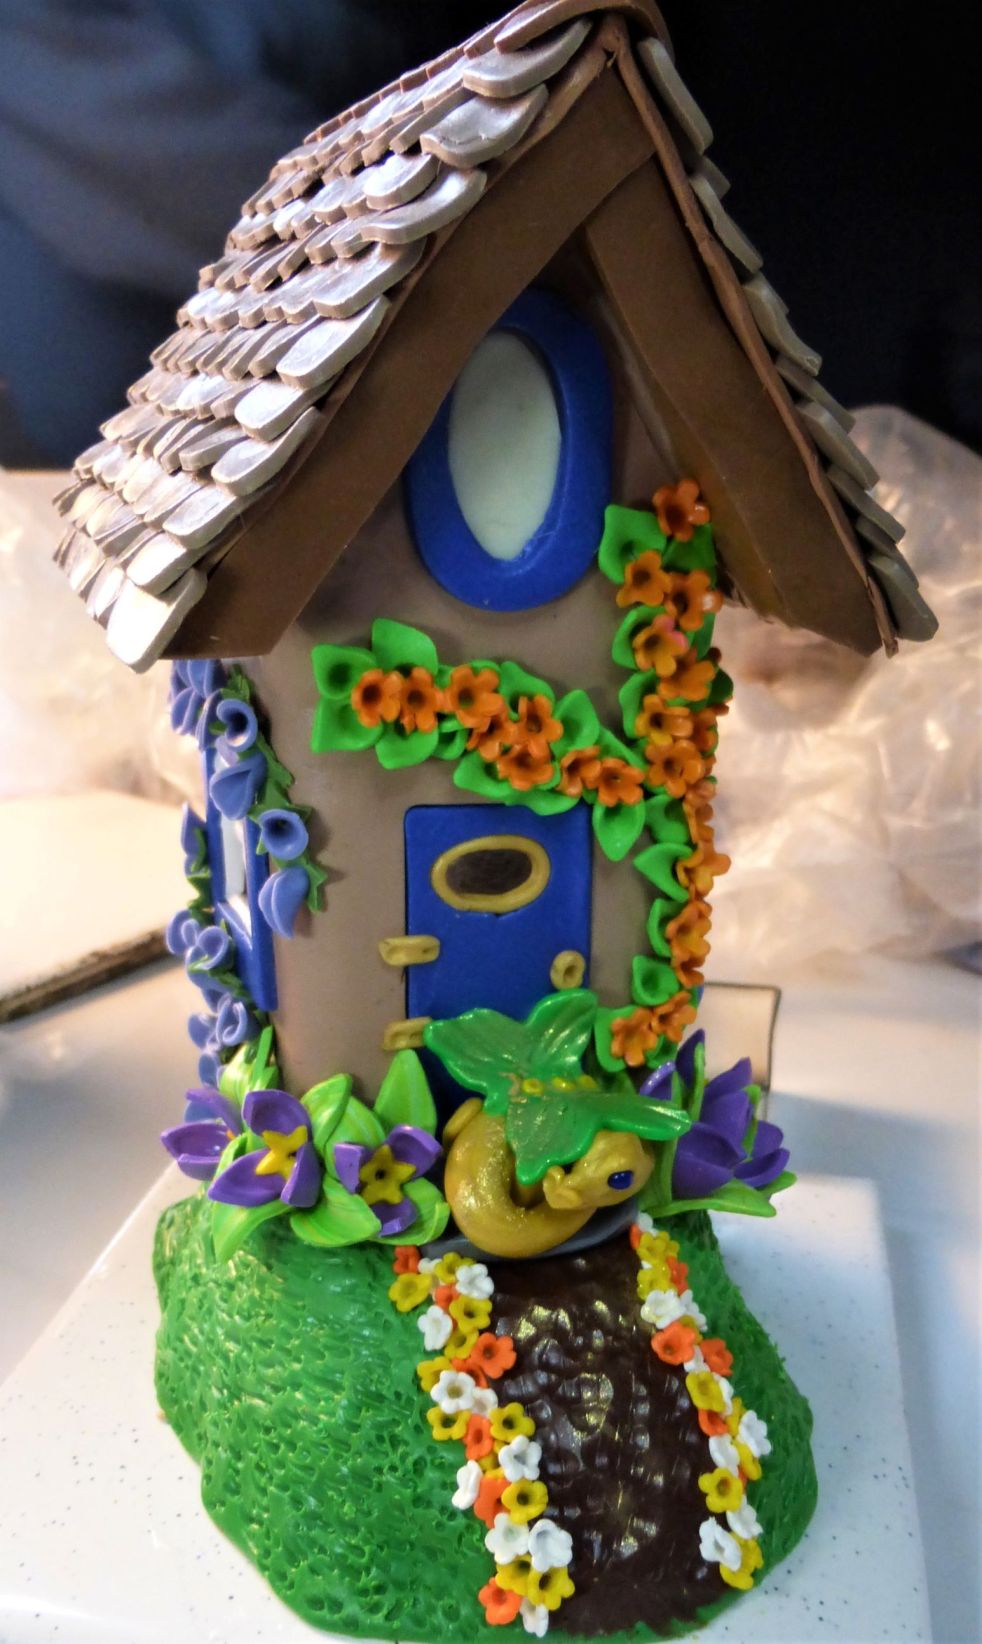
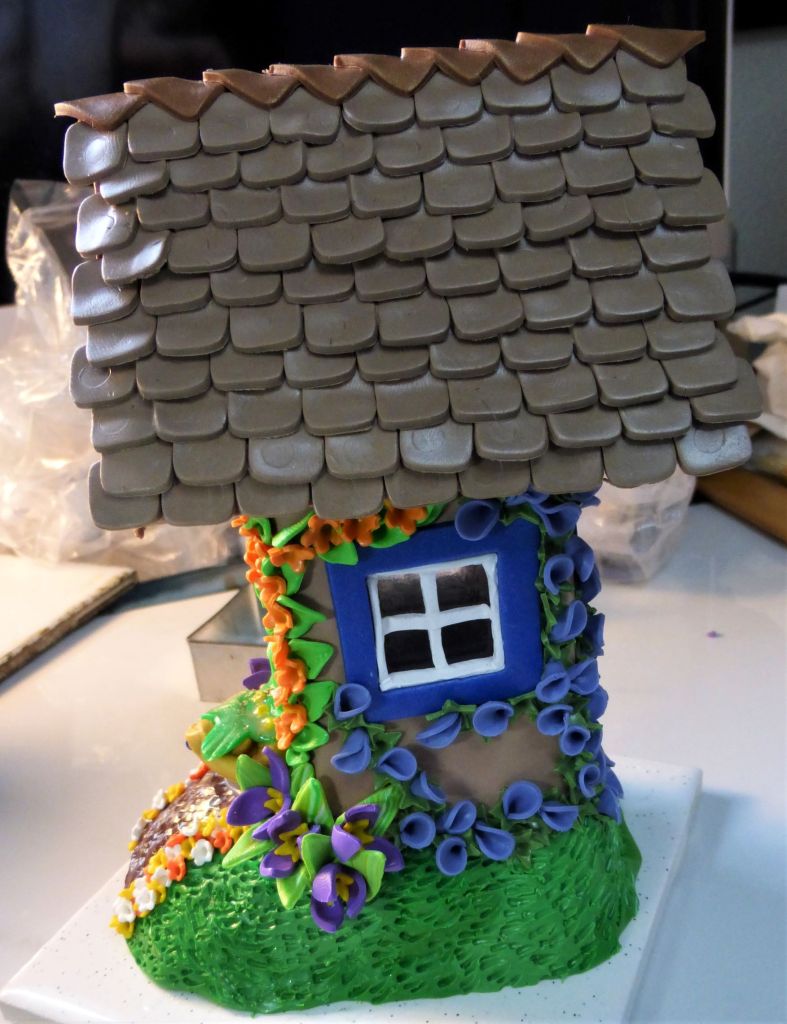
I’ve completed all the landscaping and fun finishing touches on my fairy house and it’s ready to be baked. All of this was sculpted by hand using Premo polymer clay. You can check out this post to see how this project started.
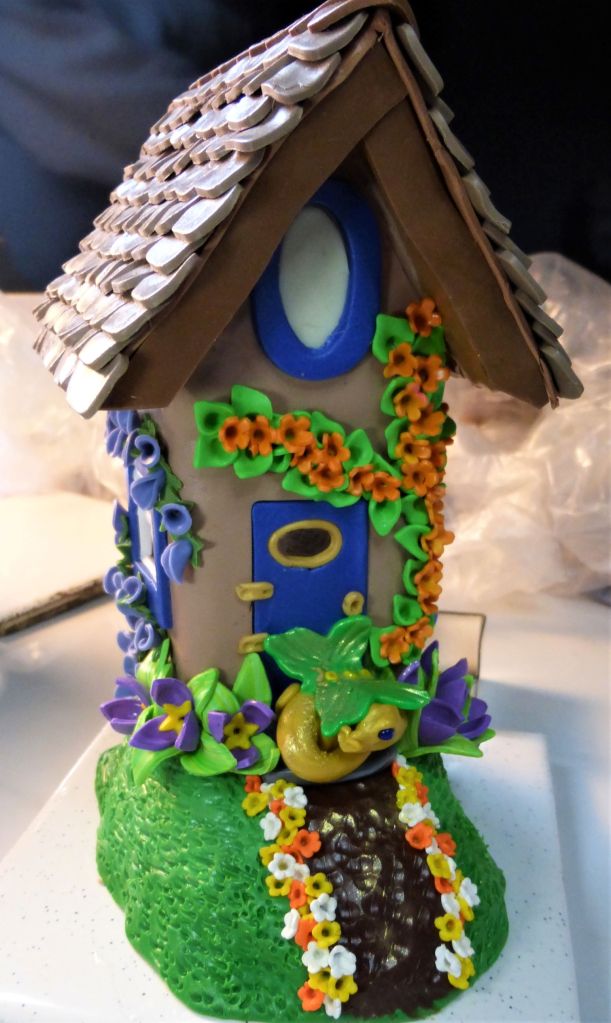
Naturally I had to add a little dragon to the front step of the house 😉 I used tiny blue beads for the dragon’s eyes and gave her green butterfly wings. I dusted the dragon’s back with gold Pearl Ex powder for a magical shimmer. She even left some magic dust on the path to the front door 🙂 I added tiny orange, yellow, and white flowers along the edges of the path. I also planted some pretty purple and yellow flowers with variegated leaves on both sides of the door.
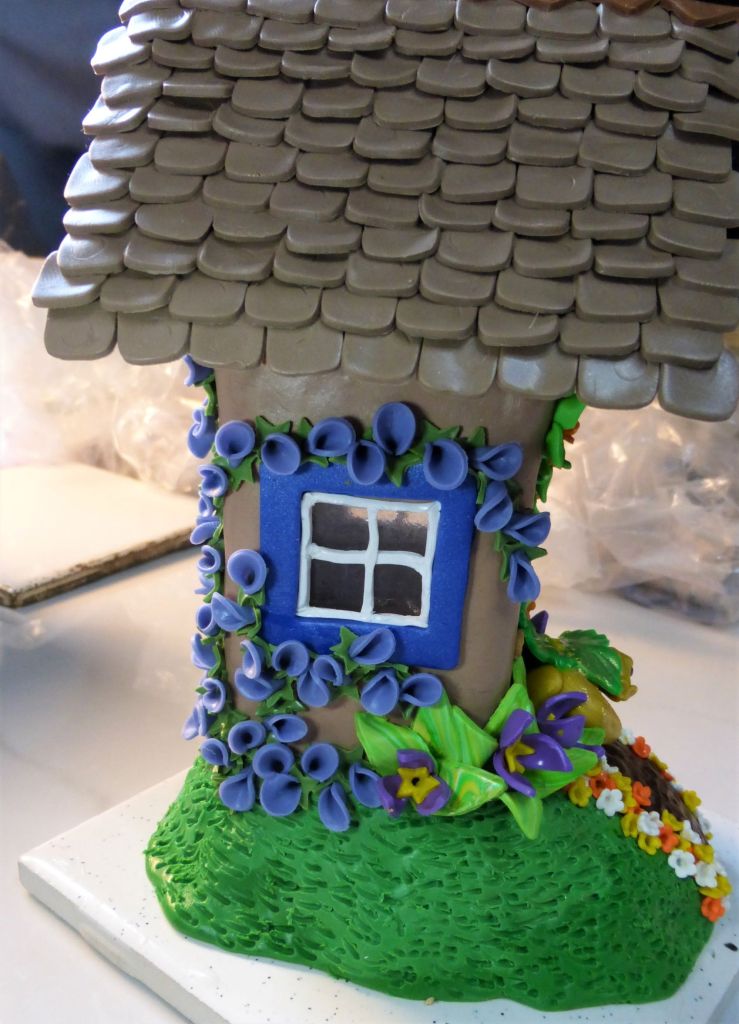
Climbing purple flowers grow around the back and sides of the house. And I added white window panes to really set off the blue frames.
Here’s the back of the house, covered in climbing purple flowers,
And more of those purple flowers, along with some orange flowers climbing the front and side of the house.
So that’s basically it for this one. I’ll bake it, glaze the dragon (to protect the Pearl Ex powders), and get it listed on Etsy as soon as I can.
I’ve already got plans for my next fairy house, and yes, there will be a dragon 😉